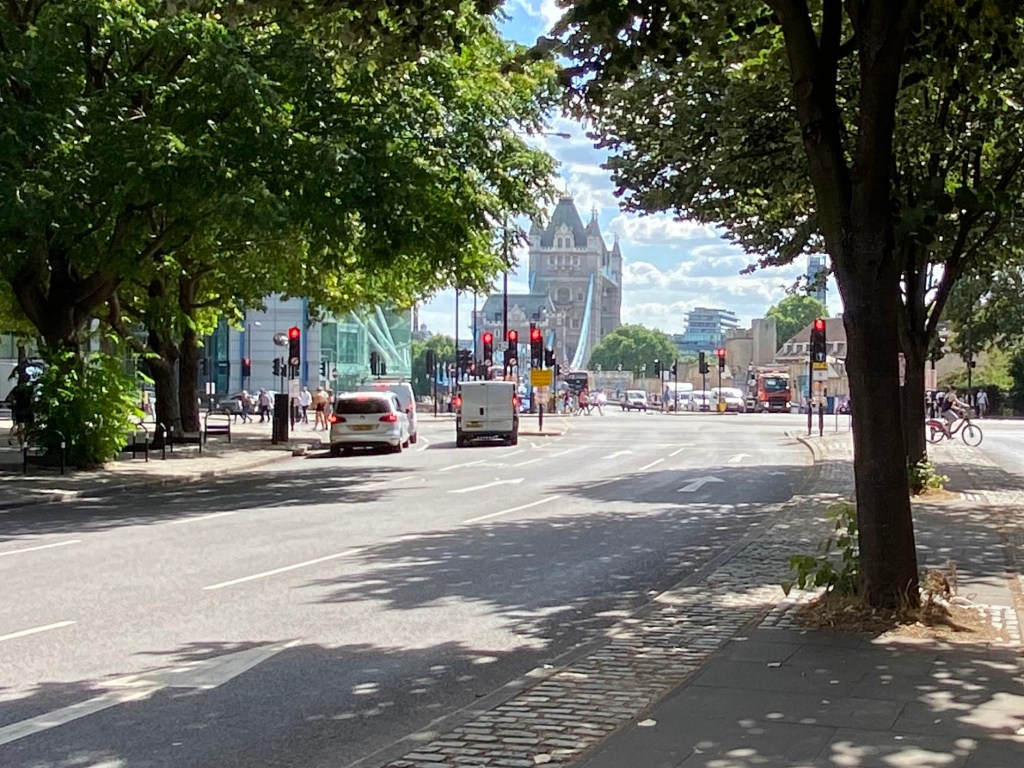
It’s been a little bit quiet on the blog front, lately – but that’s not because I’ve not been out scouting locations since the last post in August. I’d had the idea for a while that I’d like to expand from a still photo & blog posting format to making location films for a YouTube channel; well, finally – I’ve put that into action!
There’s one location video up at present – the first half of a trip I did back in October around Fulham, West Brompton and Chelsea; the video of the second half of this trip should be coming very soon.
I’ve also filmed material from a subsequent location trip in December ’23, which took in an arc from Bayswater to Clerkenwell, via Edgeware, Primrose Hill and King’s Cross. I will be working on the videos from this trip once the ‘Fulham & West Brompton Part 2’ video is published; however, there may be a bit of a snag with that one in that some of the footage I’d intended to use under ‘Fair Use’ law is initially blocked from YouTube by the copyright holder (Fremantle Media). I’m pretty confident that I have a decent Fair Use case – I’m not publishing significant portions of the footage compared to their entire run time, I’ve changed the ‘purpose’ from narrative storytelling to a documentary on the changing face of London, I’m using it to educate and inform – etc. However, the AI sitting behind the YouTube publishing engine just matches content to a database and says “nope” – so I may have to jump through some hoops to get the next videos up. Either that or, worst case, I’ll have to drastically trim the video and then work on more locations that aren’t from blocked episodes (it seems to be particularly episodes from seasons 3 and 4 that are blocked).
As to the future of written blog posts and still photo comparisons – I’m still hoping to keep these going, including writing up the recent trips that are the subjects of videos so far. It’ll just be a case of when I can actually fit that in!
For the final part of this epic trek (I’d walked over 17 miles by the end of it), I decided to take to the river. It was a nice day to get a little bit of boat-breeze, and I’d prepped finally to try and pick up some of the tangle of locations around St. Katherine’s Dock. Using the river to do so meant I’d be able to trace the voyage of a couple of Aussie crooks we’ve recently met, and pick up a couple of POV shots from the water to boot. So, off to Embankment Pier and onto the – apparently now Uber-owned – river taxi.
Episode Context – S2E10, “Trojan Bus”
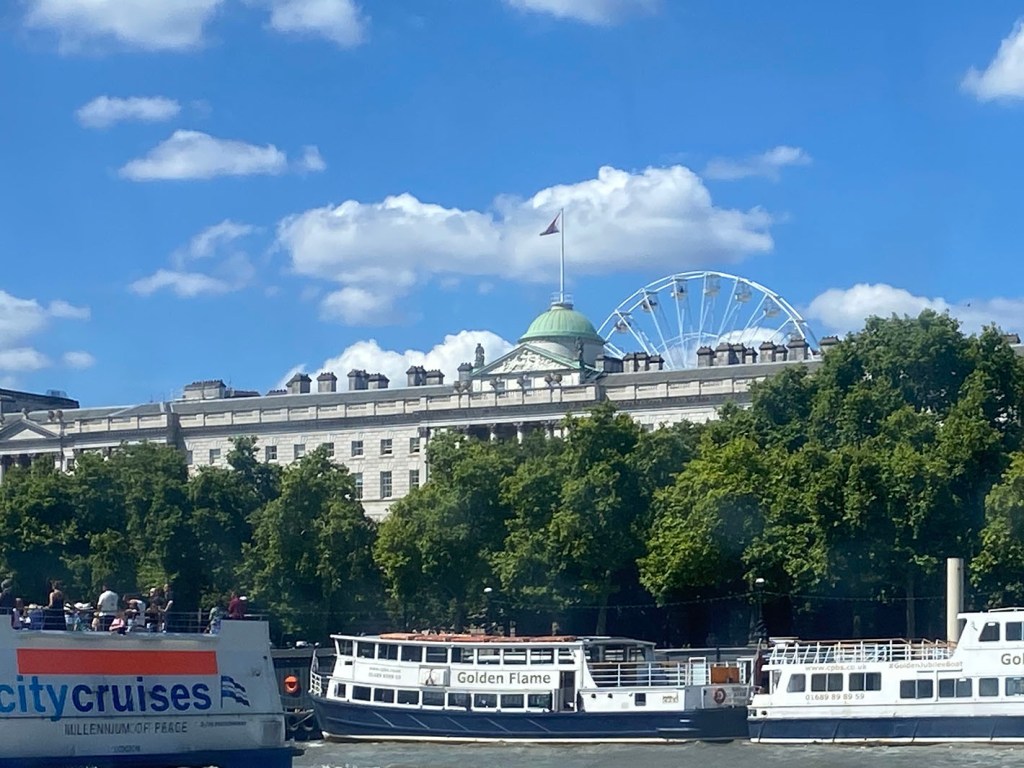
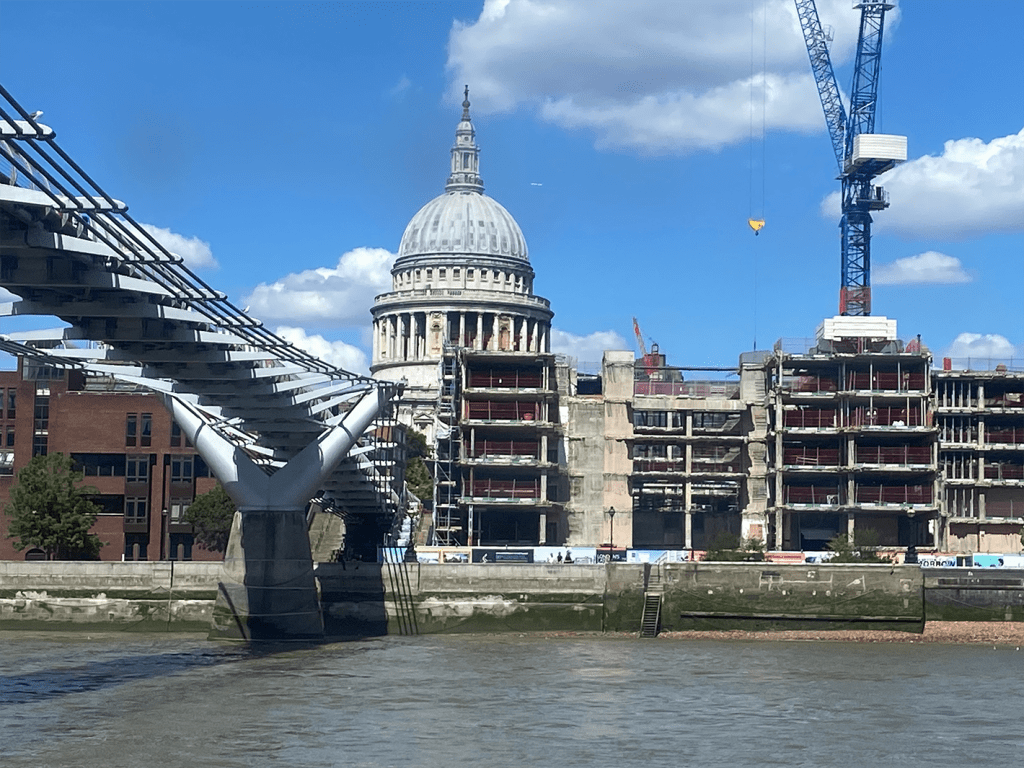
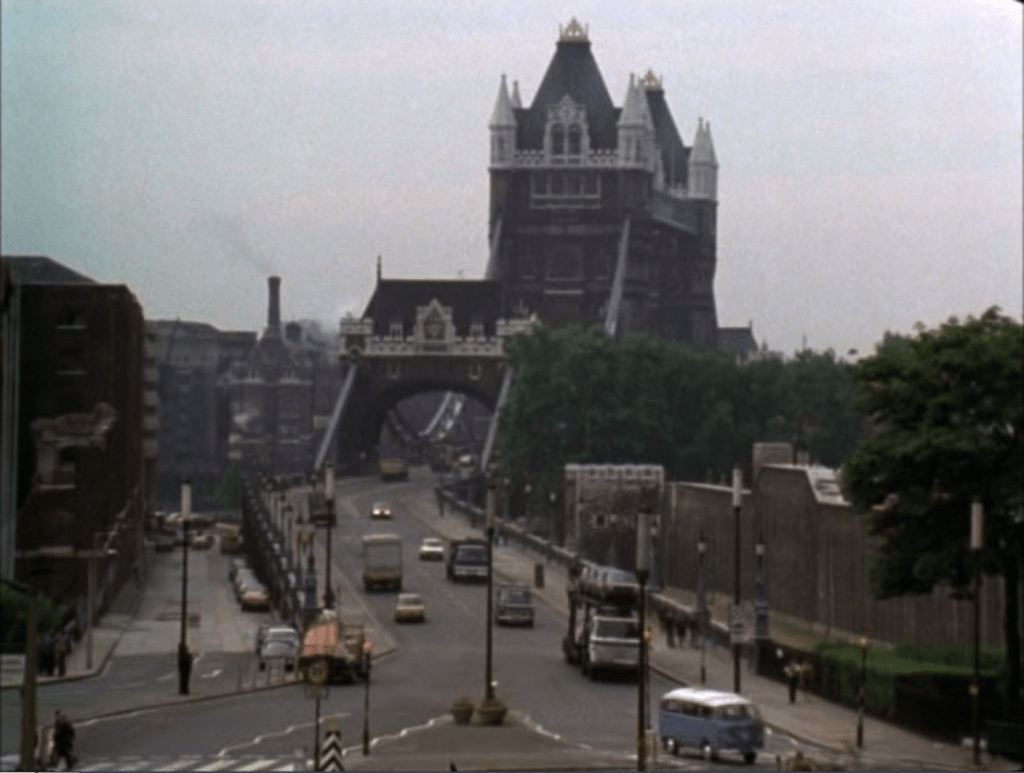
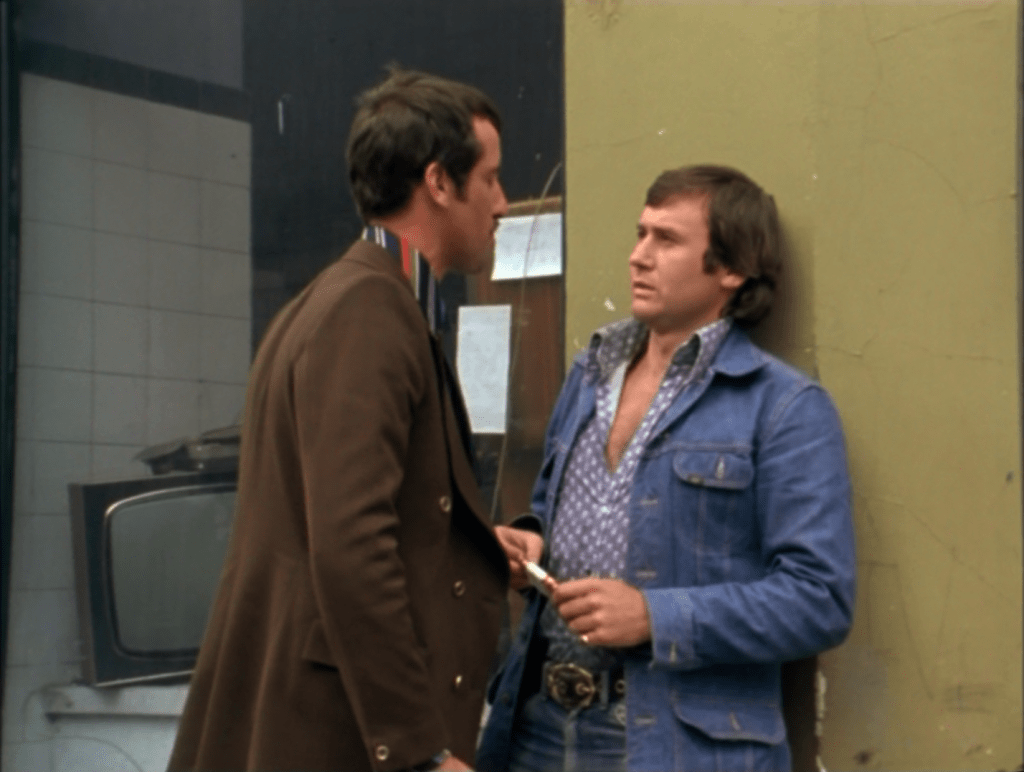
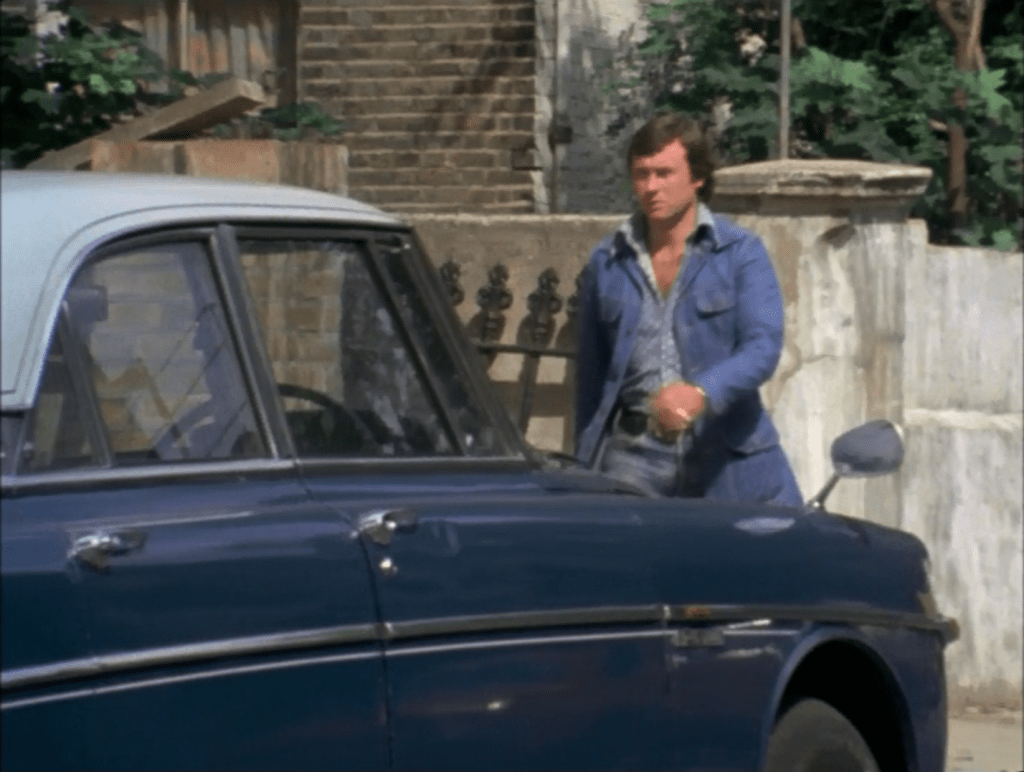
Col and Ray – remember them? Yeah, flash monkeys… Well, their getaway plan involved using a tour boat they’d ‘borrowed’ from Chertsey Marina to escape down the Thames; presumably they figured the Met boys would never think to look for them anywhere but ‘on land’. To familiarise themselves with the river and the escape route, they use the boat to masquerade as legit tour operators, and actually take a bunch of paying tourists up and down the river – delivering some uniquely ‘colourful’ Aussie-style commentary as they go. Never ones for the simple smash and grab when they can rub the law’s nose in it with their brashness, this pair. We get a couple of very recognisable tourist views from the water along the way, to establish their location: Somerset House (1) and St. Paul’s Cathedral (2).
As you’d expect, most of the ‘historic’ buildings along this part of the river are still there (and cleaner), but in and around them all pretty much everything is new. I took the St. Paul’s shot from a bit further down-river, to give the context of the ‘new’ Millennium Bridge. Hard to believe, but Regan and Carter had never even heard of the Millennium Falcon at this point, let alone something called ‘why too Kay’.
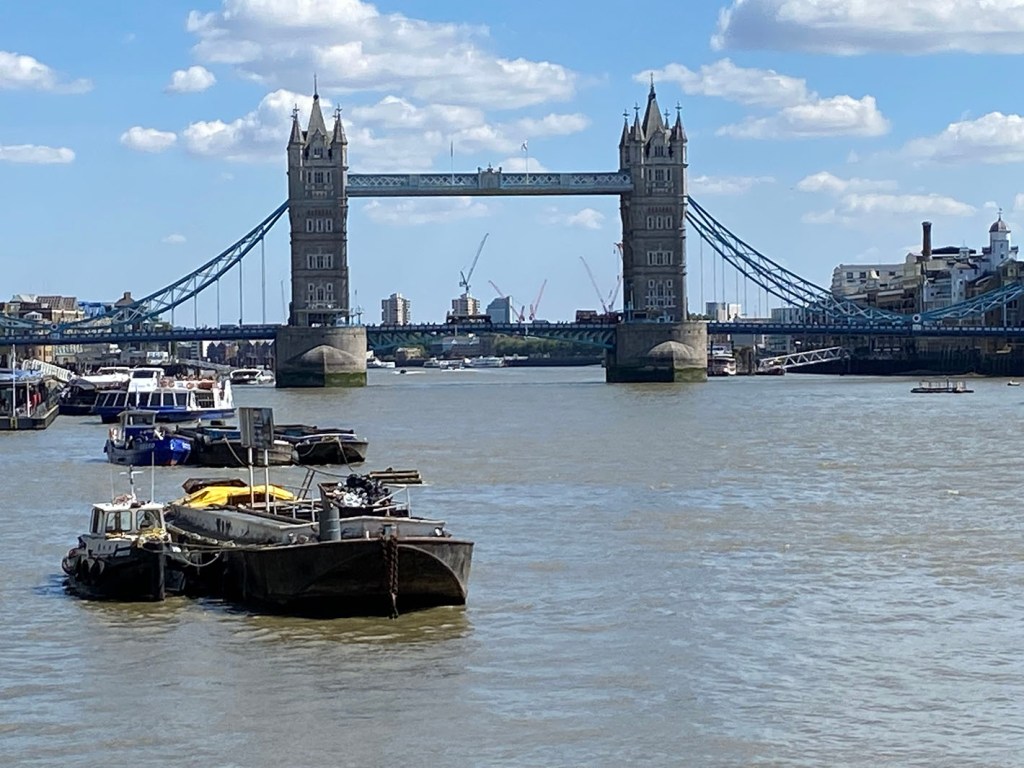
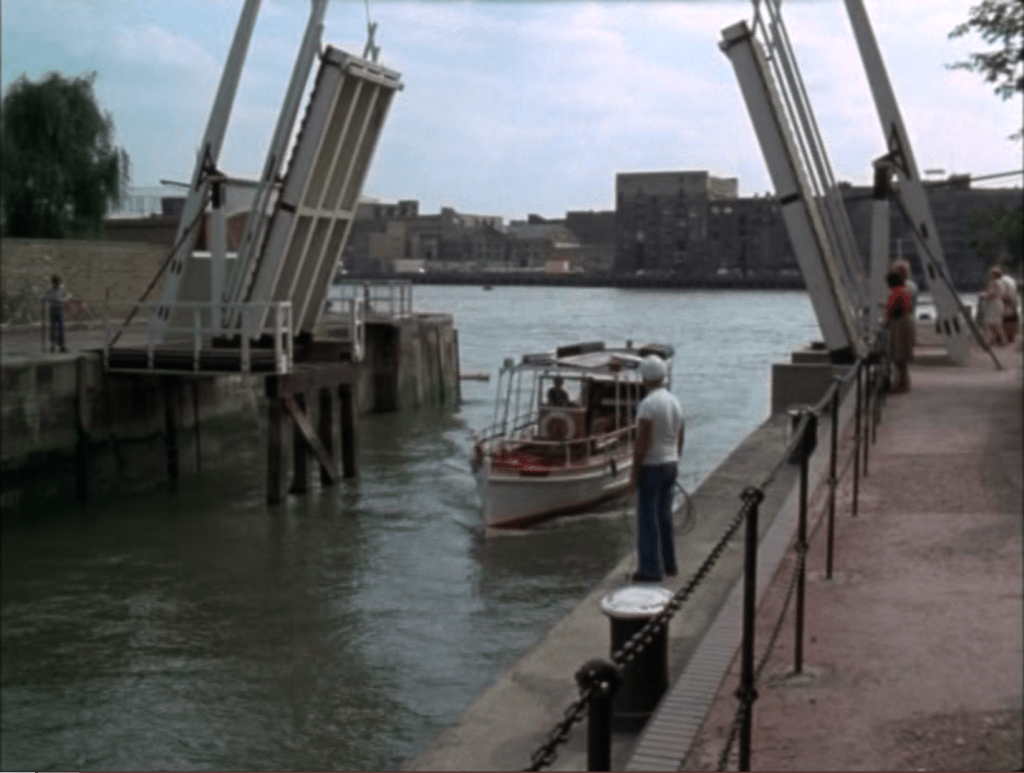
After the job has gone down and Col and Ray are on the river ‘for real’ with the stakes raised and The Squad now on their tail, they are forced to pull over towards Tower Bridge Pier and head for St. Katharine’s Dock because their fuel tank is nearly empty. Having established that they’re in a stolen boat, and quizzed the marina master as to how much fuel they’d have on board, Regan and co. learn that the Aussie Pair aren’t going to make it any further than that – so race to intercept them in the docks. We get a POV shot from Col and Ray’s boat of the iconic bridge; why wouldn’t you, I suppose? I almost felt it not worth taking a ‘now’ view as there can’t be many people other than those living under rocks in the forests of Borneo who don’t know what it looks like – but I could, so I did.
(Why wouldn’t I, I suppose? I haven’t bothered putting a map pin in for this one, though.)
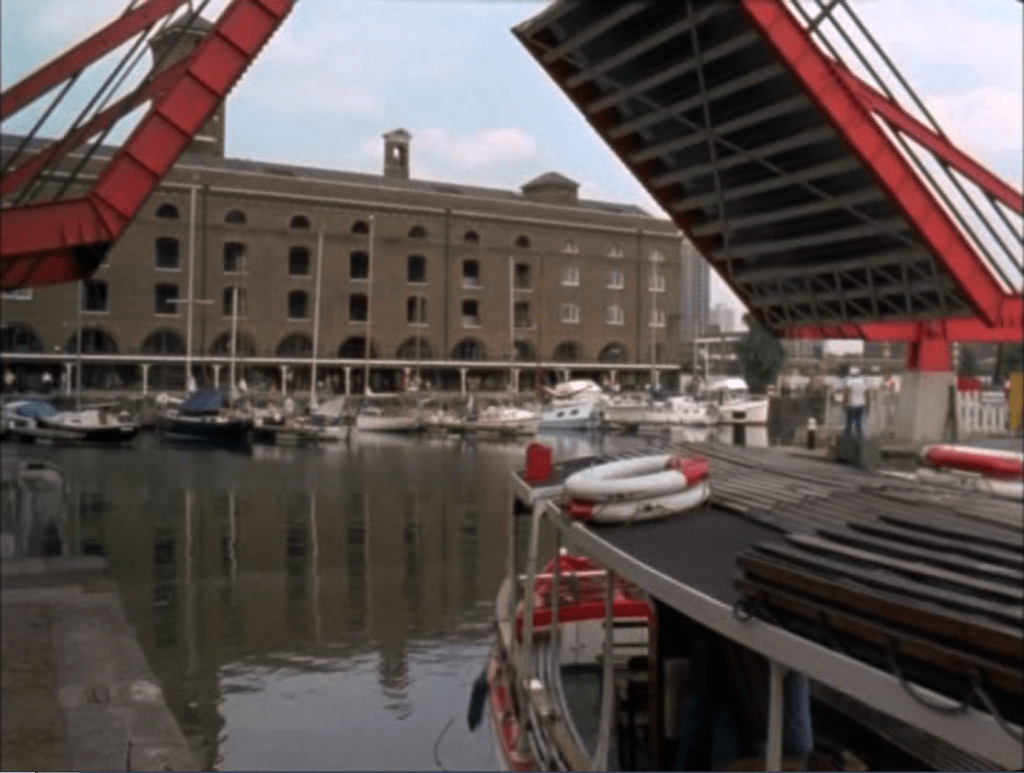
After disembarking the river taxi and stepping back onto dry land, I fought my way through the throngs of tourists in and around The Tower of London and surrounding grounds, and headed into St. Katharine’s Dock. And here’s where things get probably the trickiest of all, in terms of re-tracing the old 70s footsteps of Jack, George and co. If anywhere in London personifies the utter transformation from crumbling old industrial decay to modern, expensive swank – the London Docklands is surely it. There’s just been so much regeneration – land reclaimed, old piers and warehouses torn down, new buildings put up that radically alter or completely block former views – that it’s almost impossible, a few key landmarks aside, to really be sure that you’re in the right spot for any of the shots that were filmed in and around here. But, we’ll do our best eh.
For this particular foray into London’s former working waterfront, we’ll be bouncing between 2 episodes again – the exploits of Col and Ray, whom we’ve just followed down The Thames, and the case of Vic Labbett and his ‘Poppy’ – the stolen 400 Grand he’s back in the country to retrieve.
Episode Context – S2E10, “Trojan Bus”
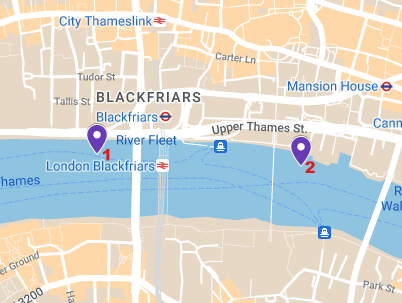
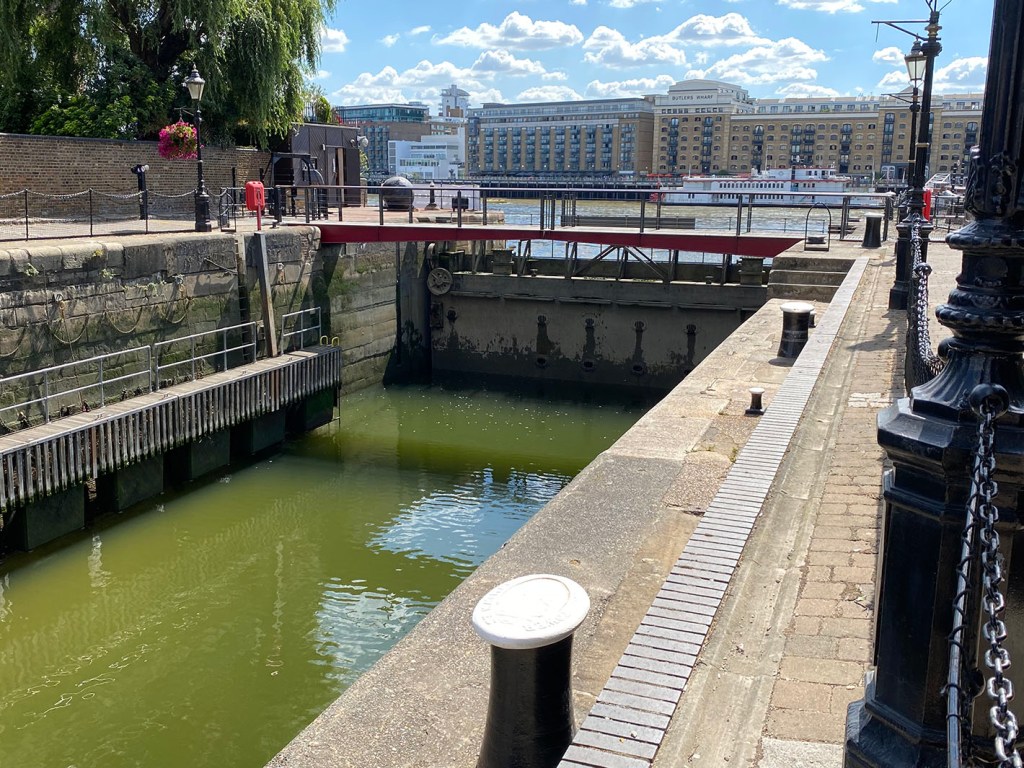
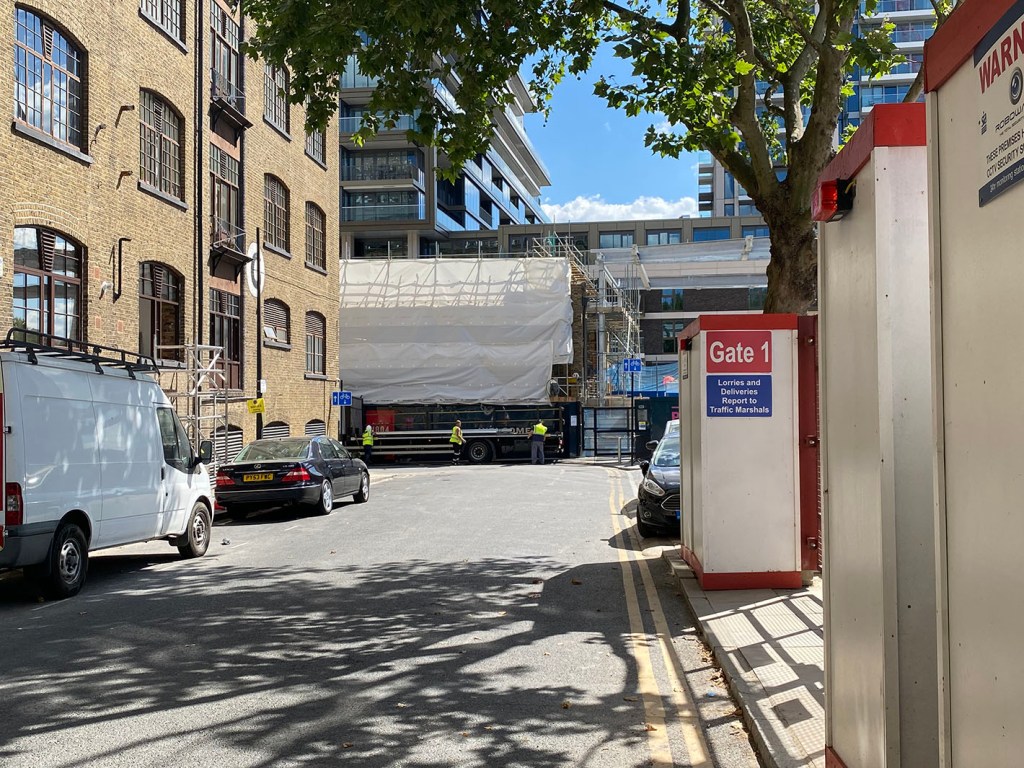
It’s MacGruder and Stackpole we’ll deal with first; as mentioned, they pull their boat into St. Katharine’s Dock as they’ve run out of fuel and their seafaring days are looking decidedly numbered. I haven’t dropped a pin specifically on the entrance to the dock on the map above; however, there’s only one way in from and out to The Thames in any case. First off there’s an outer lock gate; then immediately beyond that a road bridge above the innter gate that raises to let taller vessels through; they’re the thinner and thicker white lines respectively that you can see crossing the dock entrance on the map:
Heading a little further into the marina – and backing up the story a little – we’d actually been here earlier in the episode; it’s where Col sets up the terms of the deal for the Goya with Goldman, on board the latter’s boat (1). I won’t pass judgment here on the fact that said boat was ‘decorated’ – in a very of-the-era manner – by a girlfriend played by then Penthouse and Page 3 model, Gillian Duxbury. Presumably it was partly to give us the nod that Goldman is someone whose shady antics afforded him the high-life, and partly to give Col a bit of character-colouring distraction. Either way – it is what it was:
(One difficulty I had getting quite as close to like-for-like perspectives – besides the fact that you can’t go down onto the pontoons without they keys granted to berth-holders – was that the tide was significantly out on my visit compared to the episode. Had it been higher, the boat on the right would have filled more than just the very bottom of the frame, for example.)
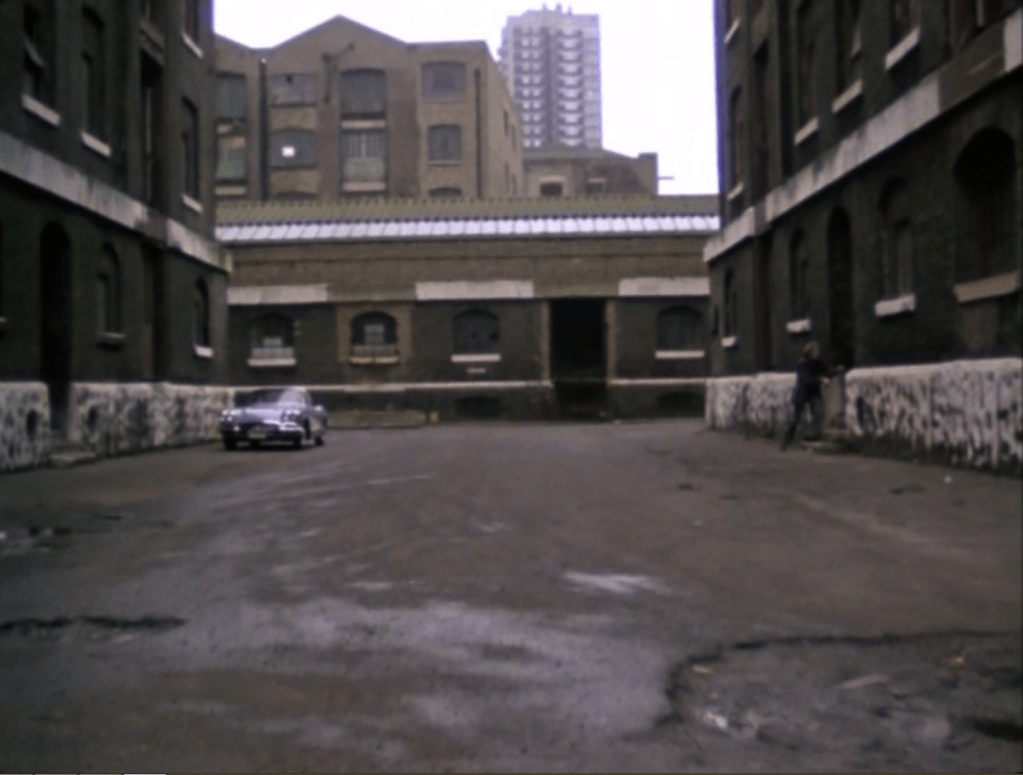
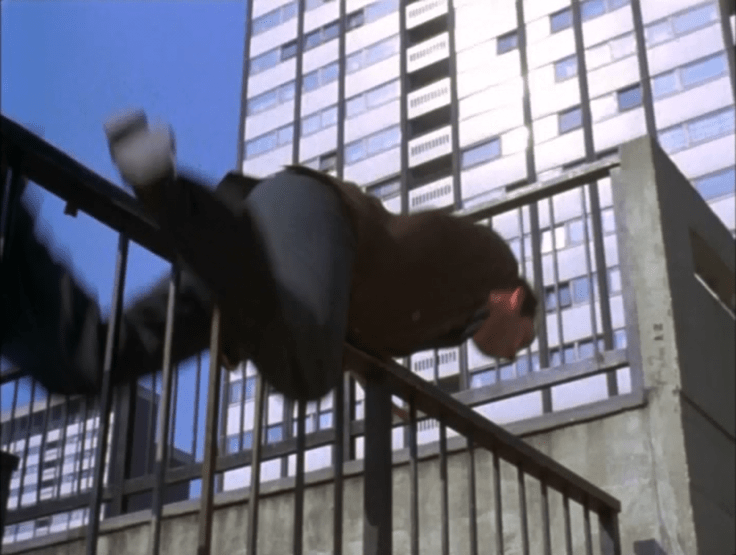
Wandering round St. Katharine’s Dock a little more, we pick back up with the ‘final chase’ part of the episode; The Squad have piled into the docks, and are hunting down Col and Ray who are now shorn of a lot of their swagger and are trying to find somewhere either to hide and evade capture, or hole up for a final gunfight. This is where a lot of the ‘loveable rogue’ veneer of their character is suddenly stripped away, and we see them for what they really are – and what Regan knew all along that they were: violent criminals who would stop at nothing and spare nobody.
There’s a great final shootout in some gloriously derelict, weedy, rubble-strewn ground that I haven’t much of a hope in hell of pinpointing now – it’s all been built on. I feel there may be a series of side-articles here, though at some point: ‘Ones That Got Away’: places that I loved seeing in the episodes that are now lost to the wrecking ball and the cement mixer.
Getting back to the bits we can see: on reflection, I’m annoyed at myself that I didn’t do a better job of checking and adjusting some of these last Ep. 10 shots here – you can clearly see they’re the same locations, but I could get them a lot closer. I may have to revisit this location at some point, but for now here’s The Squad dashing round SKD trying to pin down the errant Aussies:
Particularly annoyed about the last one – would have been so easy to ‘get that right’ had I done a better job of source-checking whilst in that location. I take an iPad with me with all the episode shots on to compare to; but it was a baking hot day and my focus was waning a little – and I don’t think I got it out of the bag at that point. (Maybe that’s a lesson that the epic full-day quests should be broken down into smaller chunks – or else left for days when I’m not likely to melt!) Anyway – moving on.
Episode Context – S2E08, “Poppy”
It’s hard to imagine there was a time when the derelict docks were of interest only to weeds and wildlife (and criminals); the idea that you could stash something below the water line of a crumbling old warehouse pier and it’d still be there several years later seems bonkers now – knowing as we do that if there’s an inch of spare ground anywhere in London today it’ll have flats and offices on it tomorrow. But we’re looking back at very different times, when a case of stolen bonds was indeed the only kind of ‘investment’ you’d find along the Thames’ old industrial wastelands. VIc’s ‘Poppy’, wrapped in several layers of plastic and then shoved inside a briefcase which was chained to a pier support and lowered into the water, has been waiting for his return; once the deal with the insurers and the bank is made, he makes his way amongst the ruined warehouses to retrieve it and meet up with Vane to do the deal.
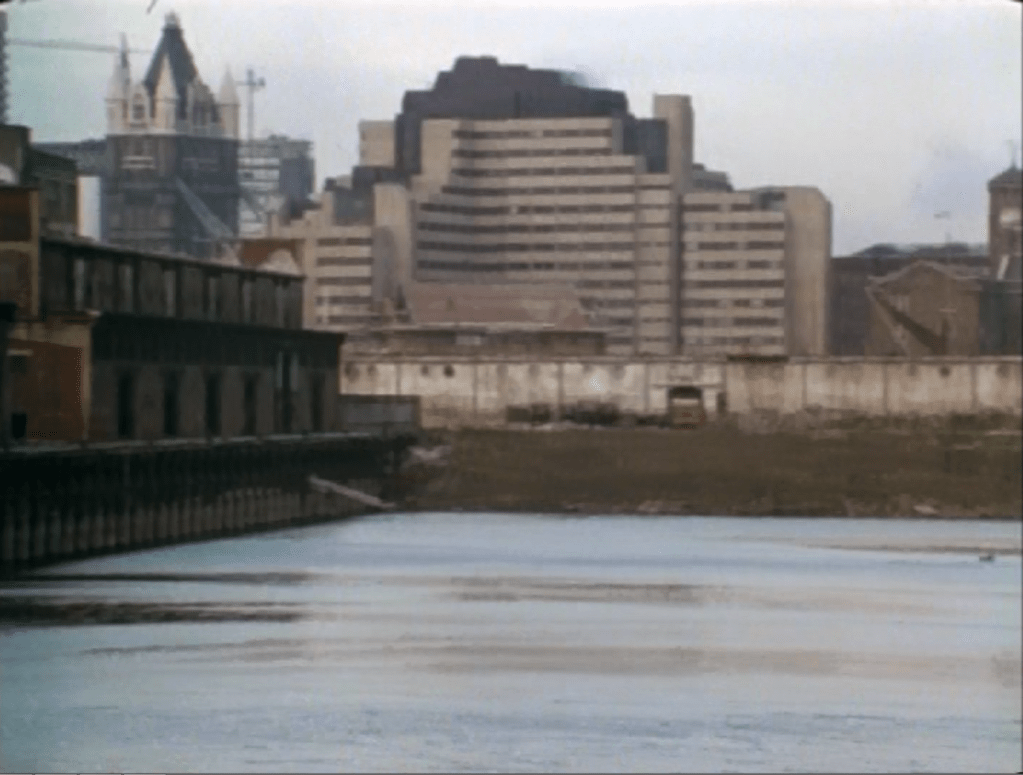
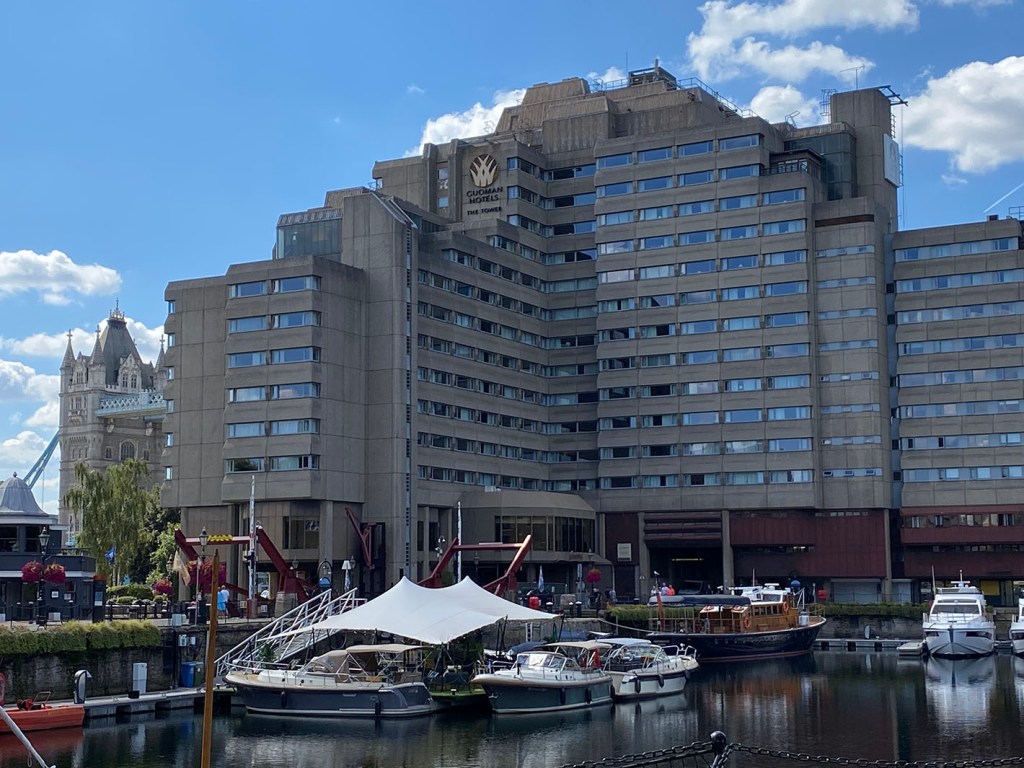
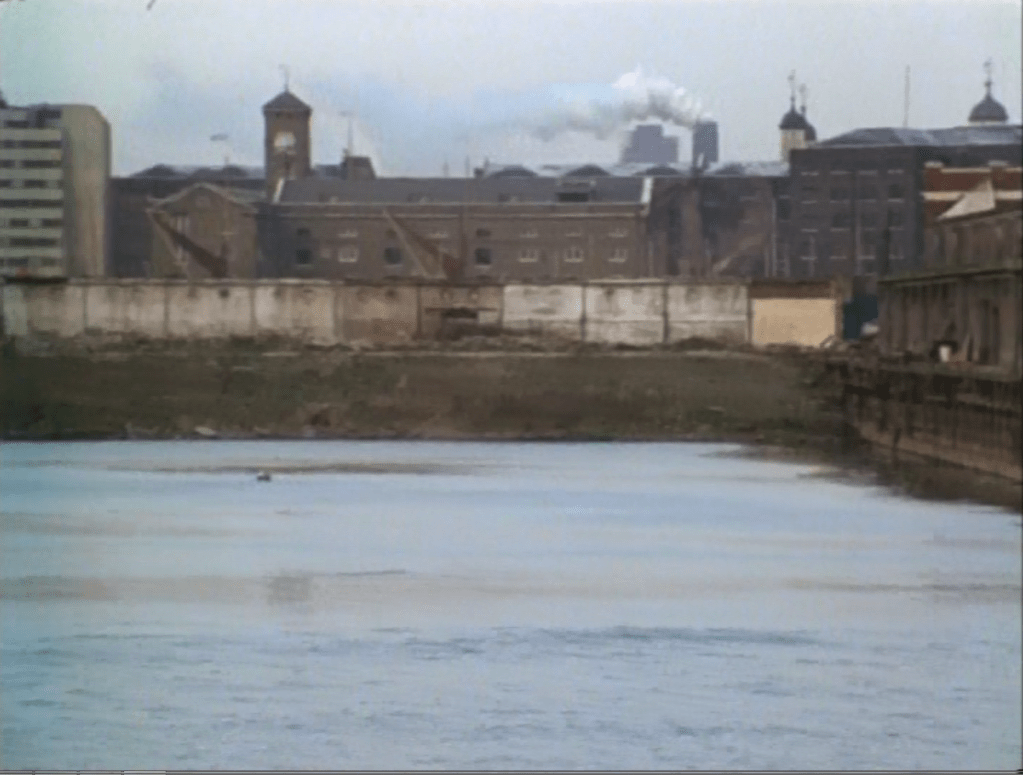
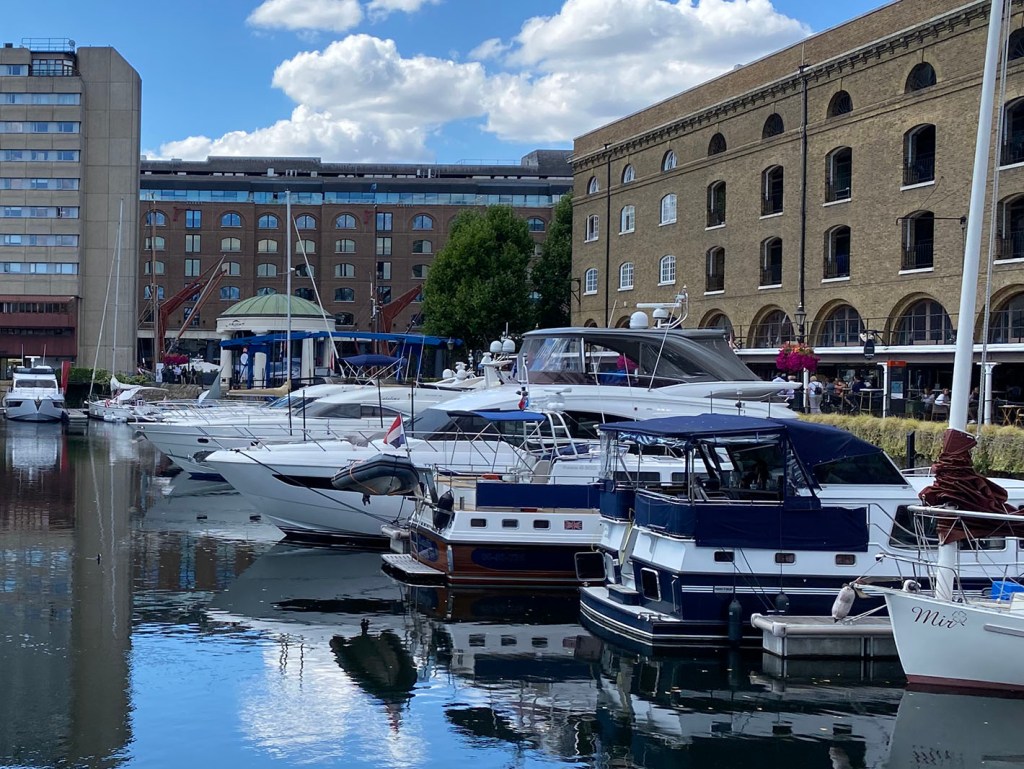
We get an establishing shot, looking across the water back towards (what is now) ‘The Tower’ hotel and Tower Bridge (2):
With the ‘now’ shot above I had to make a bit of a judgment call. The map pin is dropped roughly from where I took the shot; however, if you look at the episode shot, it must actually have been taken from much further to the East – along a section of a different dock that is now filled in. (We’ll come to this in a bit.) I could have gone round to approximately that location – but all you’d have seen is the new flats and other buildings (a pub, amongst other things) in the way. Instead, I chose to take as representative a shot I could of the hotel and one of the towers of Tower Bridge (which, keen observers will note, is the ‘far’ tower rather than the near one seen in the episode, due to the slightly different angle).
The establishing shot pans right, giving us a lovely sweep of the old warehouses and walls – again, the episode shot is taken from the now-reclaimed dock area, but you can see the corner of ‘The Tower Hotel’ in both images:
At this point the camera switches perspective and shows Vic driving down to the pier where the bonds are hidden; that whole area had some amazing sequences in and out of the industrial decay. As I said – maybe I’ll put those in a separate series of posts, and maybe I’ll be back here some time to get some extra shots (can’t remember if SKD shows up in S3 or S4!) But let’s leave the docks to it, for now.
Episode Context – S2E10, “Trojan Bus”
Prior to the closing scenes in the docks, we got a number of establishing location shots of The Squad on their way to apprehend Col and Ray; I kind of ‘worked backwards’ through a couple of these towards the end of the day – so the narrative flow of this blog entry feels a little disjointed. Up on the menu bar, under ‘Sweenealogy’ I also put pages for each episode for which I’ve visited locations – and in those I put the pictures in ‘episode order’, rather than ‘visited order’ as I do for blog entries.
Here’s a POV from inside the iconic brown Ford Consul, as it heads along E. Smithfield to the entrance of St. Katharine’s Dock (3):
Walking further along E. Smithfield, we get to another area that is now largely unrecognisable from its 70s self – and we bounce back yet again to Vic Labbett and his stolen bonds.
Episode Context – S2E08, “Poppy”
As Vic is meeting Vane in a disused warehouse, The Squad rush to nab them in the act of swapping the bonds for the stones. At the last minute, Vic spies The Flying Squad piling in on their location and believes – wrongly – that Vane has tipped them off in order to walk away with both the stones and the money. That little bit of paranoia costs Vane a bullet in the gut – and his life.
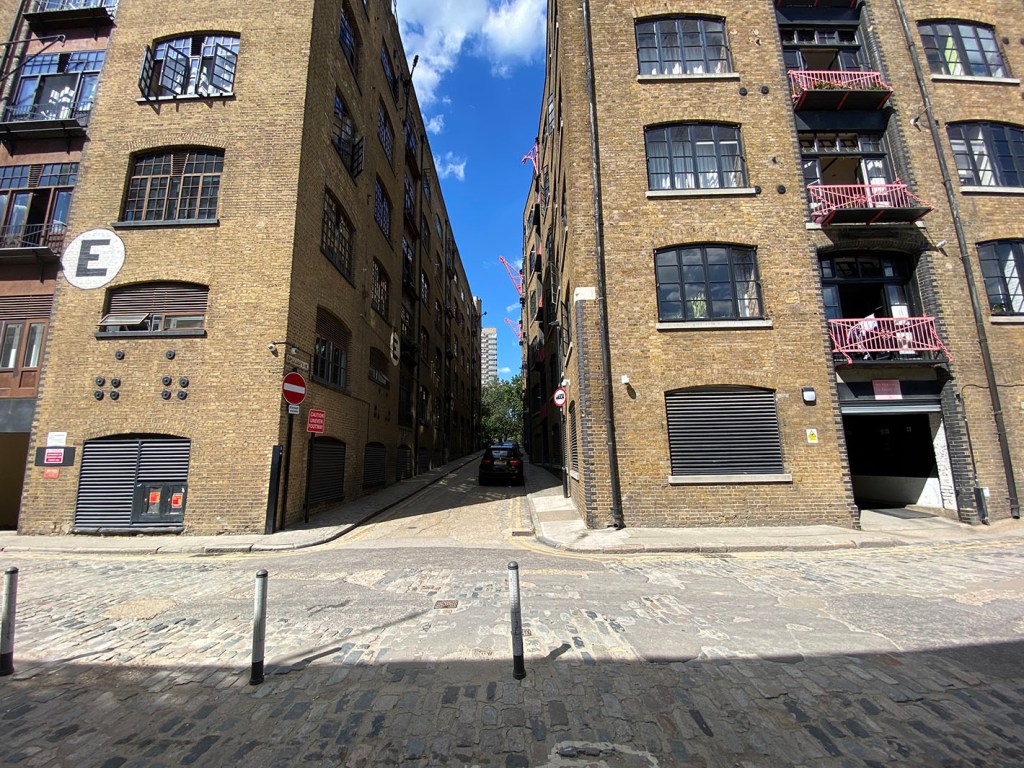
A POV shot from the Squad car as it homes in on the warehouse location is given as Virginia Street (4); hard to be sure as so much has been changed – including road layouts. Here are the closest pair I can match together, but – as with so much of Docklands – it’s getting to be largely guesswork a lot of the time:
The street in the episode turns right when it hits the end wall; in ‘real life’ you actually turn left at the bottom of Virginia St. now. I’ve been up and down the street – and all the ones nearby – from every angle, and nothing really tallies – so I can only imagine that it’s under the heading of ‘changed beyond any reasonable recognition’ now. The road sign you can see in the middle of the episode shot is too blurry to read as we track POV from inside the car, so that’s no help in determining the location.
Walking down onto Pennington Street, which is listed as the location of the warehouse where Vic meets Vane to do the deal, we’re again confronted by an area that has changed extensively (5). On both shots below (we’re looking North) you can see a tower block looming in the distance – a lot further away, seemingly, in the perspective of the phone-photo:
The warehouses on the right hand picture – now converted to fancy dwellings, of course – are actually the ones you can see in the middle-distance on the episode shot, beyond the lower-rise units with the glass skylights that run across the middle of the frame. That means the warehouse in which Vic was holed up is South of those lower-rise ones (the ones that run along Pennington Street directly – and which are ‘behind my back’ on the second photo). Vic’s warehouse and those adjacent to it have since been demolished; it would have been fairly difficult to get into the area where they once stood (I’ll explain why in just a sec) – and even had I done so, all you’d have seen is the back of the Pennington Street warehouses. So here, again, I went for ‘as close a view that gives you something recognisable to latch onto as possible’.
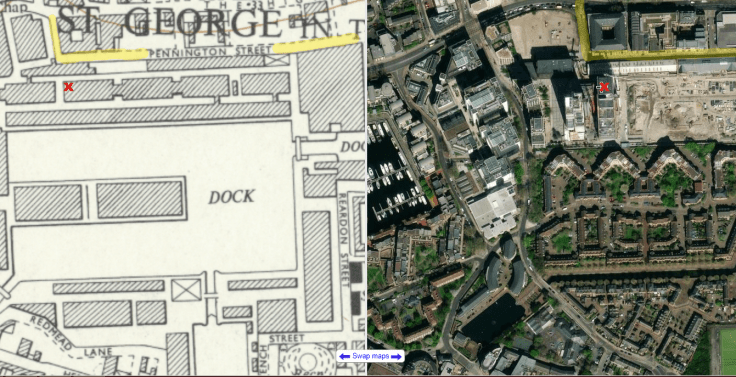
A little further detective work bears out my assumptions above: if you look on Google Maps ‘satellite view’ of where Victoria Street hits Pennington Street, you’ll see that right below those lower warehouses along the southern edge of the latter is a mass of currently razed ground – ‘Merino Gardens’, where new development is taking place. The warehouses in which Vic meets Vane, to which The Sweeney rush, can actually be seen in this old side-by-side map view; hovering your cursor over them on the left puts the right-hand cursor in what is now the new development site:
In the image below, I’ve put an X on the ‘right hand’ warehouse from the episode shot above – the one into which we see George and co running, from Vic’s POV from an upper-floor window. The corresponding X over on the right is a new tower block, and to its right you can see the area of razed ground where further building is taking place:
You can see in the ‘old’ map above that there are access roads in and around the warehouses that no longer exist; it’s possible that some of the in-car POV shots were taken from these. (I’ve highlighted where Victoria Street runs into Pennington Street in yellow.) You can also see on the left-hand side – dominating most of that frame – ‘DOCK’; that is all now filled in and reclaimed land. In the episode, the final chase scenes where The Squad hunt Vic in an out of the old derelict buildings and piers took place here. The pier where the loot is hidden is directly along the northern edge of ‘DOCK’, and you can see some walkways on the right-hand part of the old map that connect the warehouses to the dockside buildings. There’s some good sequences of The Squad running across these.
OK, so I’ve indulged in a little “ones that got away” already. May do more of this in future. Let’s head now towards what was the final location for this particular set of Sweeney shenanigans.
Still working ‘backwards’ through this climactic part of S2E08, we have a shot of the squad car approaching Tower Bridge (6) as it heads to the warehouses on Pennington Street:
Looks very different with the lack of trees and dour 70s rainy grime 🙂 With that, it’s time to leave Vic and his Poppy and head – nowhere, we’re staying right here – for what was finally, the last action of the day.
Episode Context – S2E10, “Trojan Bus”
Another set of villains hiding in the docks; another establishing sequence of The Squad racing in their Ford Consuls towards Tower Bridge to intercept (7). We’re back after Col and Ray – this is just prior to the shots from the car as it pulls into St. Katharine’s Dock via the ‘elephant gates’ earlier in the post:
I did my best here, but short of climbing a tree or standing in the middle of traffic, I couldn’t get quite like-for-like angles 🙂
So there we have it; my biggest quest yet – and all on a burning hot August day. By this time I was pretty much cooked, and – though I’d prepped for heading North towards some other locations – I decided to head to Tower Hill tube and back to Waterloo for a train home. But not before a quick – and though I say it myself, well-earned – bit of liquid refreshment. Cheers!
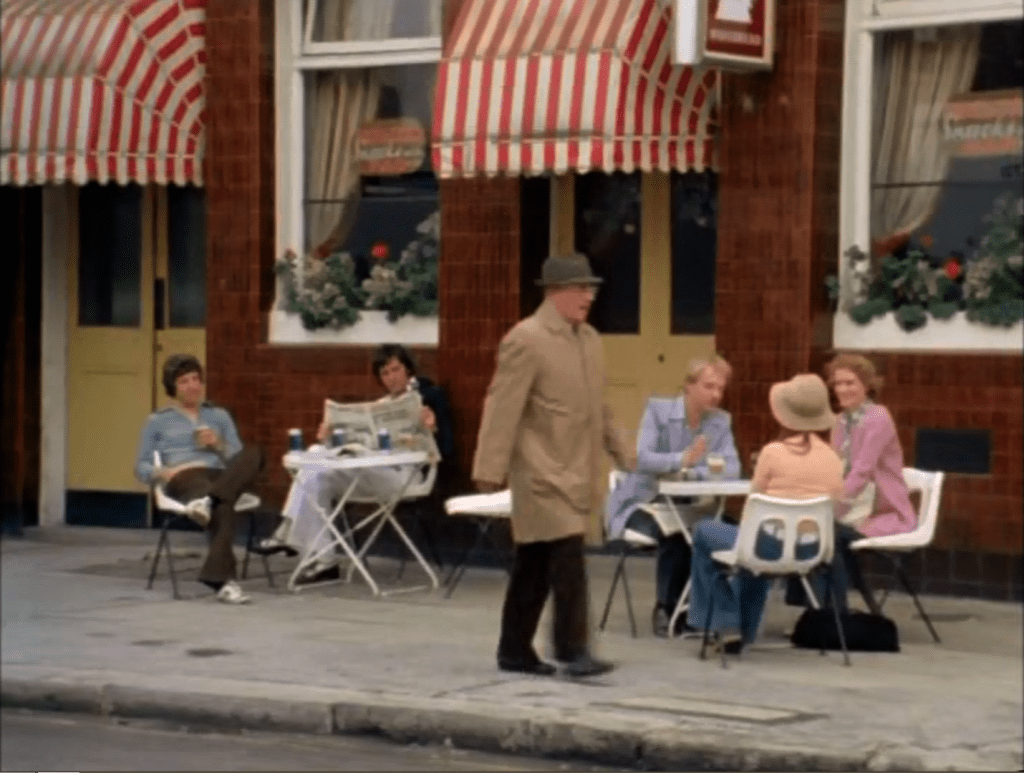
We left Part 2 just outside Julie’s in Holland Park, having just failed to apprehend the mystery diner who’d met up with Frankie Little. This trip spent quite a bit of time bouncing about between episodes 9 and 11 of Season 2, and it was back to the former for the next location.
Episode Context – S2E09, “Stay Lucky, Eh?”
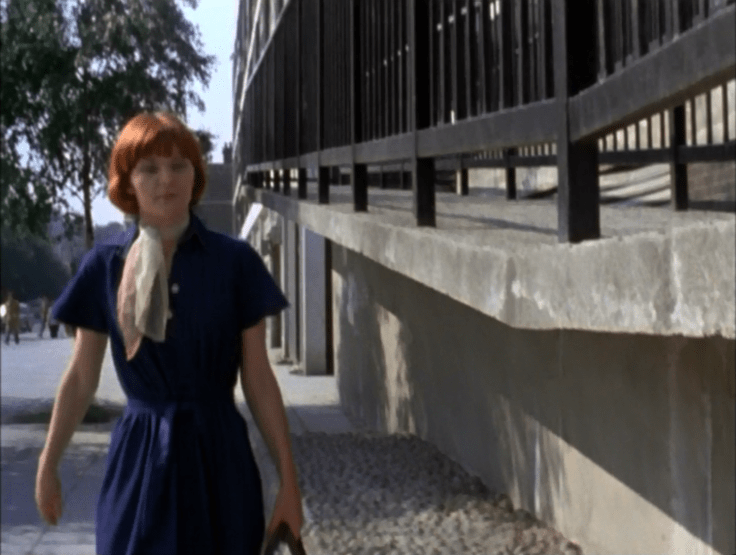
Back to Tony Kirby, and the case of his unrewarded 2 grand, the missing loot from the job he financed, and the errant Tyson and Jenner. There are a number of scenes set inside Kirby’s house – very swanky digs fitted and furnished with the best that ill-gotten gains have to acquire, as you’d imagine; however, there weren’t any exterior establishing shots or similar until quite late on in the story. At this point, a set up has been instigated by The Squad wherein the mystery robber who swooped in and took the spoils is known to be heading back to the theatre where Herbie Mew – the little bird who’s been tweeting him information on the jobs being pulled, but who now refuses to have anything more to do with him since it turned ugly (shooters and so forth) – works. Regan and co. make a tip-off to Kirby’s crew that the thief who took ‘their’ money will be there – so Kirby and co. tool up and head to the theatre. We see them leaving Kirby’s house, on Hillsleigh Road just off Holland Park Drive.
Next up was a bit of a walk North, through Notting Hill in the direction of Westbourne Park. We were to return to the exploits of Tyson and Jenner and co. fairly soon; but first of all, a detour into a ‘new’ episode for me.
Episode Context – S2E10, “Trojan Bus”
We’ve not been there yet in any of my travels, but an earlier episode in S2 sees two young Aussie tearaways – MacGruder and Stackpole (Col and Ray to their associates) – pull a series of audacious armed robberies of Krugerrands before escaping the country. All flash and swagger, they are convinced they have the measure of the British law enforcement, and are back on our soil – this time to pull off an art heist. Independent art dealer Leonard Geisler has a rare self-portrait by Goya, that he’s about to sell to a buyer from one of Europe’s big-league galleries. Tipped off about the painting by his assistant, Nancy (“there’s got to be a bird… there’s always a bird”), the Aussie Boys test Geisler’s credulity by first pulling an old “buy-back” scam on him; when that goes off as expected, they are green-lit for the real job of snatching the painting, which they plan to sell to a buyer from Amsterdam.
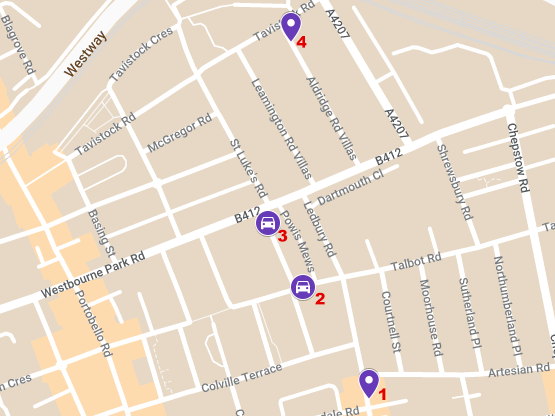
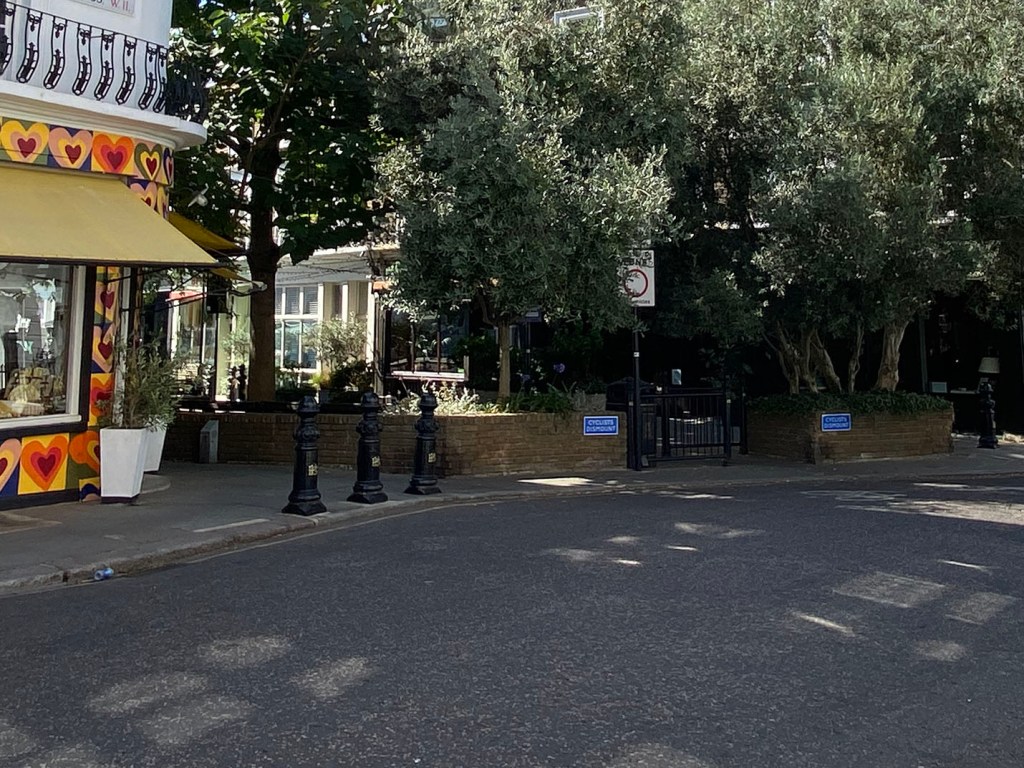
Geisler’s art gallery is on Ledbury Road (1), next door to ‘The Walmer Castle’ pub, from where Col and Ray observe his comings and goings:
You can see that the pub has had the inevitable spruce-up; nice to see the old tiles still intact, though. On the top pair of pictures, a lot has obviously changed; the basements have been opened up, the frontages have been redone, and the door to Number 60 which served as the gallery entrance (from which Col is exiting on the left-hand shot) has been moved to the right of the premises, and is now directly adjacent to the pub.
In the meat of the episode, Col and Ray steal a bus to snare Geisler – who always catches the same one from outside the gallery when travelling to appointments. In the first pair of shots, they observe Geisler from the pub as he heads to the bus stop:
For the job itself, Nancy makes sure to shoo Geisler out of the gallery with the Goya in time to catch ‘his bus’ (she’s convinced him that nobody would suspect a little old man with a brown paper package is carrying anything valuable) – the bus in question being the stolen one that Col and Ray are driving up Ledbury Road from the South:
After that little interlude into Aussie territory (if you’re not now humming ‘Nice and Easy Does It’ to yourself, then clearly you’ve never met Col and Ray!) it was a short walk North to grab the final set of locations in this neck of the woods.
Episode Context – S2E09, “Stay Lucky, Eh?”
I said it wouldn’t be long before we were back on the trail of Tyson and Jenner, and here we are. Skef Warren and Kirby’s other henchmen have been out trying to unearth Tyson, who has been laying low since the ill-fated job. They catch up with him coming out of a newsagents on Talbot Road (2) – and Skef ‘persuades’ Tyson to join them in Kirby’s car to go for a little chat with Tony about the job.
The shots are all very closely cropped action, so it’s difficult to immediately tell from them that the ‘now’ shots are definitely the same place; you’ll just have to trust my meticulous research on that one 🙂
Once they’ve come to a gentleman’s agreement that Tyson will accompany them to see Kirby, the car drives off up Powis Terrace (3):
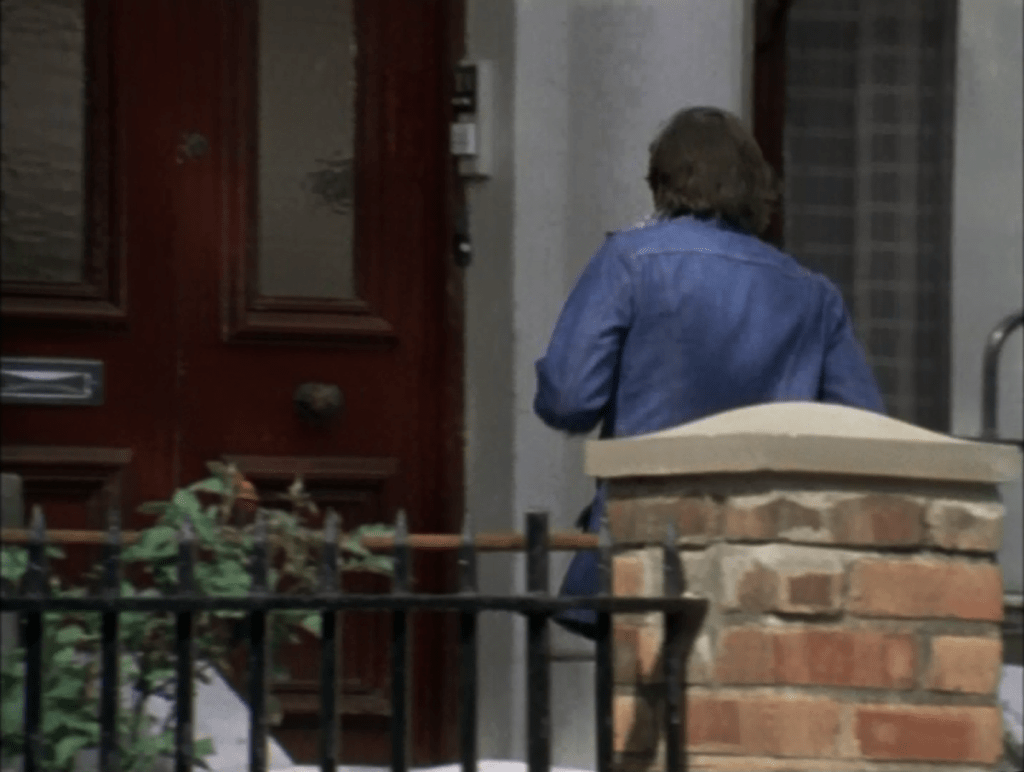
After this, I had just one more stop to make on what had already been a fairly epic first part to the day – another little walk further to the North to Aldridge Road Villas (4). Number 46 is where Jenner lives with his wife Liz; Regan and Carter have the place staked out, and see Tyson going to visit them, both to find out about Jenner’s treatment for the gunshot wound, and to report on what has happened between him and Kirby’s crew:
Again, we have some pretty closely-framed shots here, but you can definitely see that the door to number 46 is the same, just repainted black, Some of the original walls and railings are still intact, too – but the house on the corner that Tyson passes in the first pair of pics has obviously been largely demolished to make way for a far more modern ‘Grand Designs’ type affair.
With that, it was finally time to declare lunch; I walked the rest of the way up to Westbourne Park, and caught the tube via Paddington (and a quick stop there for a sandwich) back to Embankment for the final part of the day.
We left Part 1 on the SW side of Holland Park, having just (re)visited Oakwood Court – this time actually being aware that there was an episode location to be had rather than just walking through to somewhere else. As mentioned, more of this ‘retreading old ground’ was about to come – several times over, in fact; to that end I headed North, and back to ‘The Bush’.
Episode Context – S2E09, “Stay Lucky, Eh?”
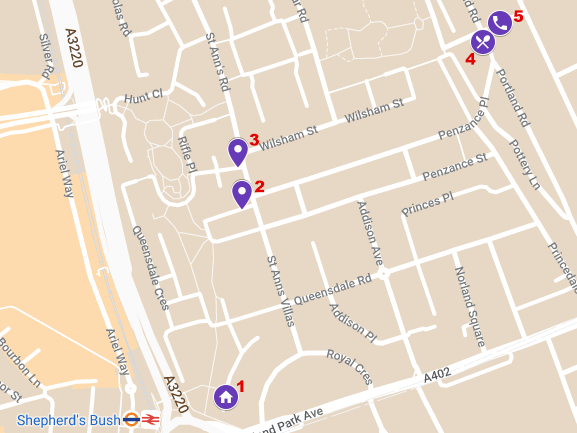
Crime kingpin Tony Kirby has put up two grand front-money for a job being pulled by two of his young villains, Tyson and Jenner. The job goes exactly to plan, and the pair make it away with piles of cash back to their hideout (1). However, it seems a mystery third-party has been tipped off about the job, and is laying in wait for them on their return. Caught with their guard down, the pair are robbed at gunpoint and relieved of their spoils. In the ensuing fray, Jenner gets a bullet in the leg which needs urgent medical attention; just as much of a problem – they will now have to explain to a less than understanding Kirby why his two grand outlay has netted him nothing in return.
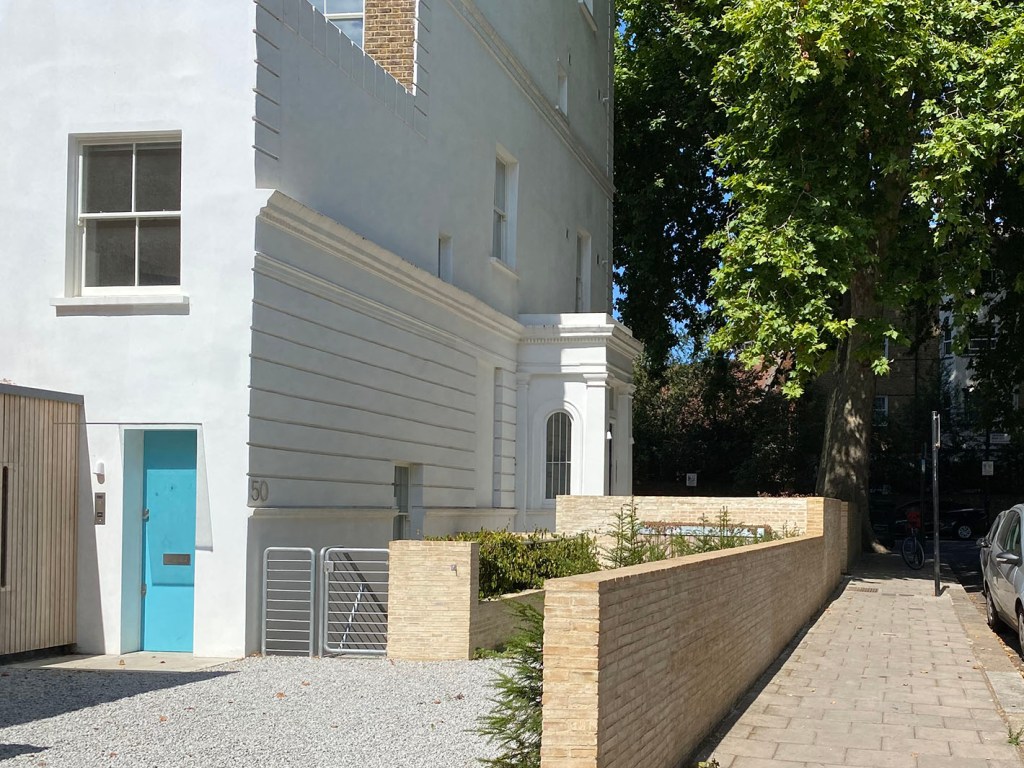
Tyson and Jenner’s hideout is a small lock-up in Royal Crescent Mews, just across the West Cross Route from Shepherd’s Bush Station. We’ve been here before – S1E02, “Jackpot” – where The Sweeney intercept a gang of robbers after a job, and in the massive punch-up that ensues a bag containing £35,000 goes missing. This time, we’re looking from the ‘dead end’ down to the right of the Mews as you enter it, back up the curve – i.e. towards where the Jackpot scenes took place, the latter having been filmed looking back towards where we are below:
I didn’t bring any milk bottles with me; nonetheless you get a pretty good sense that the general ‘frames’ of the buildings have not changed. As mentioned in the past though, the upkeep – and price tags – are an entirely different matter.
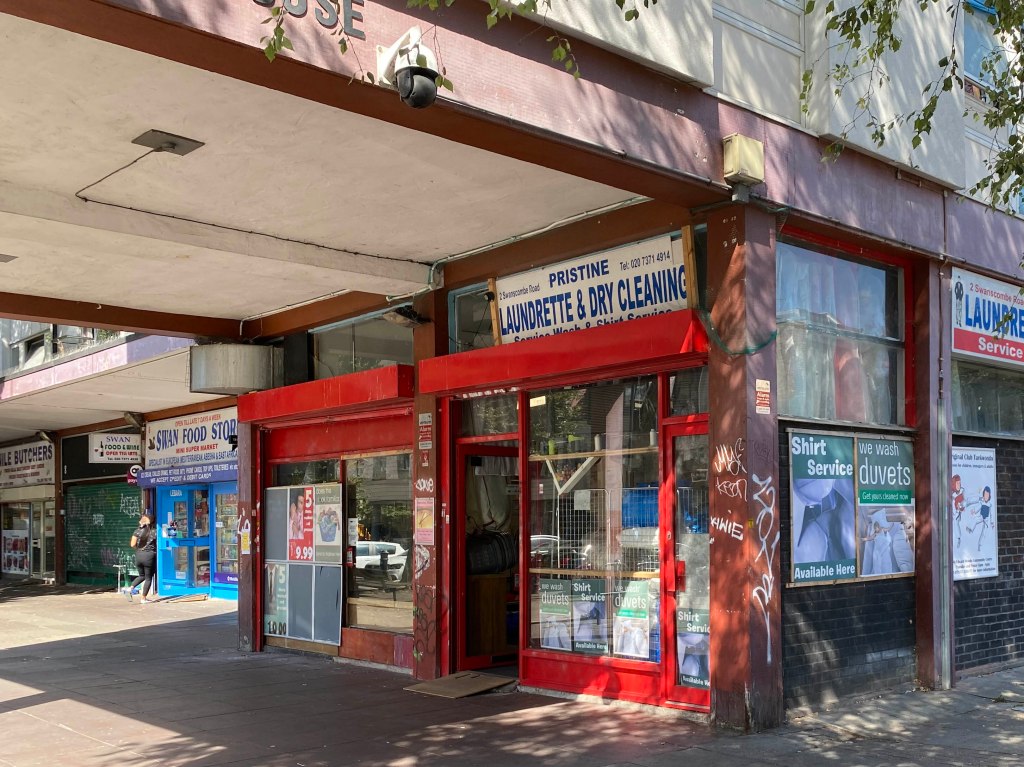
Walking a bit further North, we’re onto yet another previously-visited location seen from a different angle (2). The parade of shops on Swanscome Road is where ‘Lionel off of Brush Strokes’ accosts the teacher who worked with Carter’s missus in S2E05, “Hit and Run”. This time around, we’re looking at where Regan and Carter chase Tyson in and out of the flats and shopping area as they attempt to figure out who is behind the robbery and what’s happened to the money.
Here we see Tyson scarpering along the parade of shops and out onto St. Anne’s Road:
Tyson doubles back into the service alleyway that runs into the flats, which you can see in the middle of the second set of shots above:
In the alleyway, Tyson winds George before scarpering off again – where he is intercepted and knicked by Regan, back in the courtyard in the middle of the flats, where (a slightly breathless) George catches up with them:
The interior area of the flats has changed quite a bit – from a big open patch of grass to a fenced-in ‘peace garden’; there are a lot of old bits of the flats / buildings that have been knocked down as well, and new sheltered housing and other accommodation built in their place – so it’s sometimes a little hard to get your bearings from the original episode shots to what you’re looking at today. The ones above are all pretty clear; the next couple less so, as a lot of old concrete walkways we’re about to see got demolished.
The area in question (3) is just a few paces up St. Anne’s Road towards where Queensdale Crescent joins it; here we see Skef Warren (Boysie? Never heard of him) – one of Kirby’s heavies – catching up with Jenner’s Mrs. They can’t find Jenner, so they’re taking the next best thing in their attempt to get hold of the missing money. Skef follows Liz (yeah, ‘er off of Eastenders) and drags her into Kirby’s car for a little chat.
Looking at the “then and now” you can see that the raised walkway surrounded by railings ran right along St. Anne’s Road and round into the entrance to Queensdale Crescent. Liz walks down St. Anne’s Road (first pair – it’s the road to the left of the red brick flats in the ‘now’ shot), and round into Queensdale Crescent in the shadow of the raised area (last pair). The red brick flats have been built where the raised area was torn down. In between those 2 viewpoints, we see Skef jump over the railings down to “street level” to accost Liz. All of that raised area is gone as just mentioned; there’s a cafe (‘Nourish Hub’) along the street front, and the pub that was on the opposite side of Queensdale Crescent (you can’t see it in the episode shot) is now yet more flats. In addition, there’s been a lot of new building behind where this was shot, which now obscures a good deal of the view of the old tower blocks you used to get. Still, the general sense is still there. (I did a fair bit of detective work searching for old photos online in order to check I’d definitely got the right spot – eventually found the “telling” one on an architecture site that showed the designs for the renovation of the area.)
After spending time in and around the towers, it was time to head NE to the next spot, in the direction of Notting Hill.
Episode Context – S2E11, “I Want The Man”
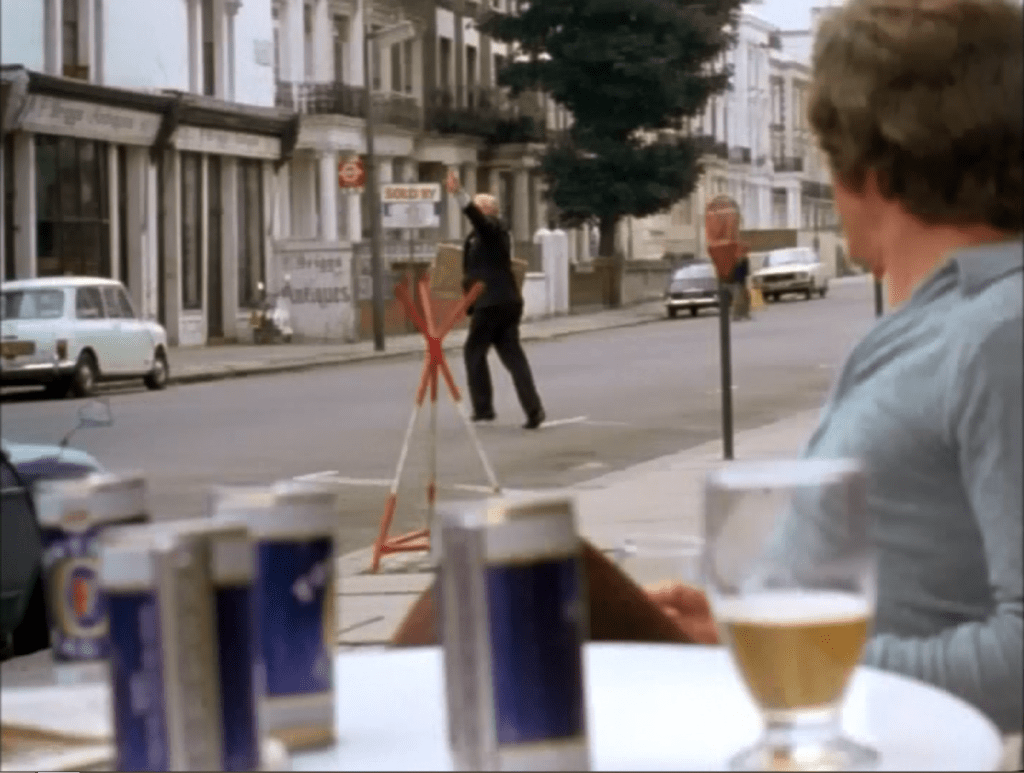
Back to the case of a missing set of gems (front for an even bigger job), a missing informant (“Popeye”, who was caught in the act of phoning Regan with info on the job) and Frankie Little – the recently released small time crook who is on over his head. Popeye has spotted Frankie going into a restaurant (4 on the previous map) with an unknown woman; he phones Regan from a nearby phone box (5). Unfortunately for him, whilst he’s got eyes on Little, someone else has him in their sights.
This is Popeye’s view from the phone booth, looking back to the restaurant (the dark-fronted building just left of centre. (There’s those ‘trees in full leaf’ obscuring the now-shot, that I mentioned in the intro to Part 1!)
The Squad arrive on the scene:
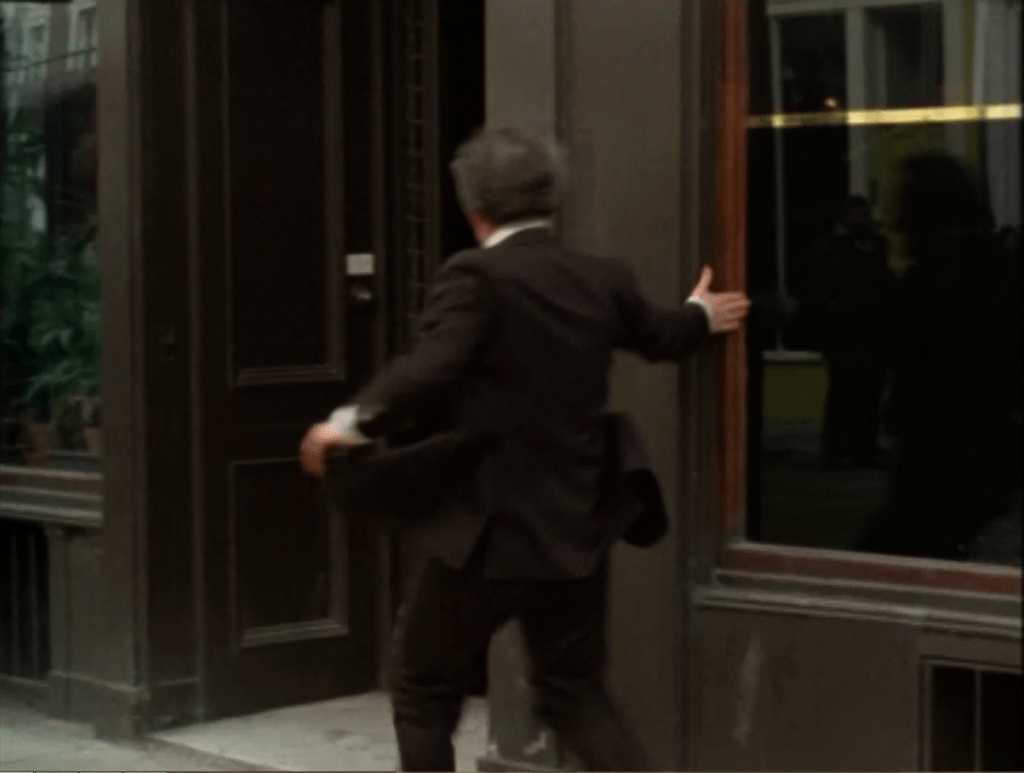
Regan enters the restaurant through the front door:
Unfortunately, the mystery accomplice has been tipped off by staff and has fled out the back way; Regan and co. follow and search the immediate area, but to no avail. (All they find is a blonde wig dumped in the bins round the back.) They exit the back yard out onto the side-street:
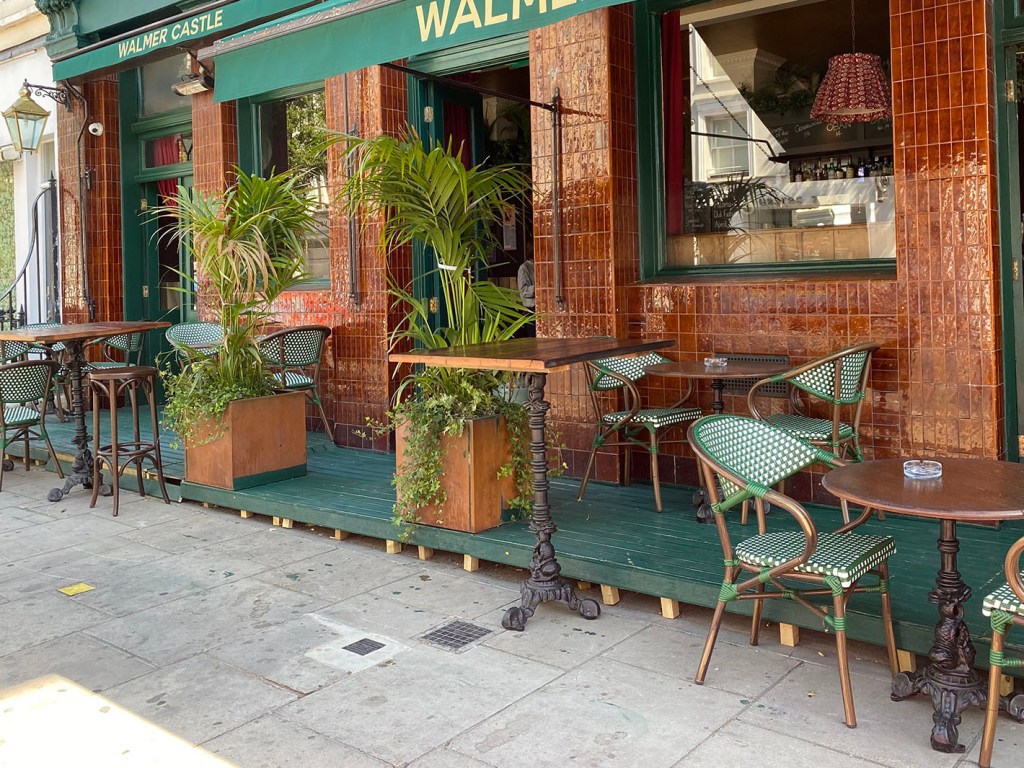
Incidentally – the restaurant in question – “Julie’s” – is still going under the same name today.
A hot, sunny August day when the city swelters can be a bit of a double-edged sword for such exploits as tracing The Squad’s old haunts. On the one hand, you get to enjoy the fine weather without fear of being cold and soggy; however, it also means that London Town is full to bursting with tourists, and (a factor you wouldn’t immediately consider) the trees are in full leaf, and doing a fine job of obscuring lots of things you’d like to photograph. However, not to be deterred, I set off bright and early on the train and arrived at Waterloo just around 8AM. I walked from there – via a coffee stop at Embankment – to the first port of call, Old Compton Street.
Episode Context – S1E05, “Jigsaw”
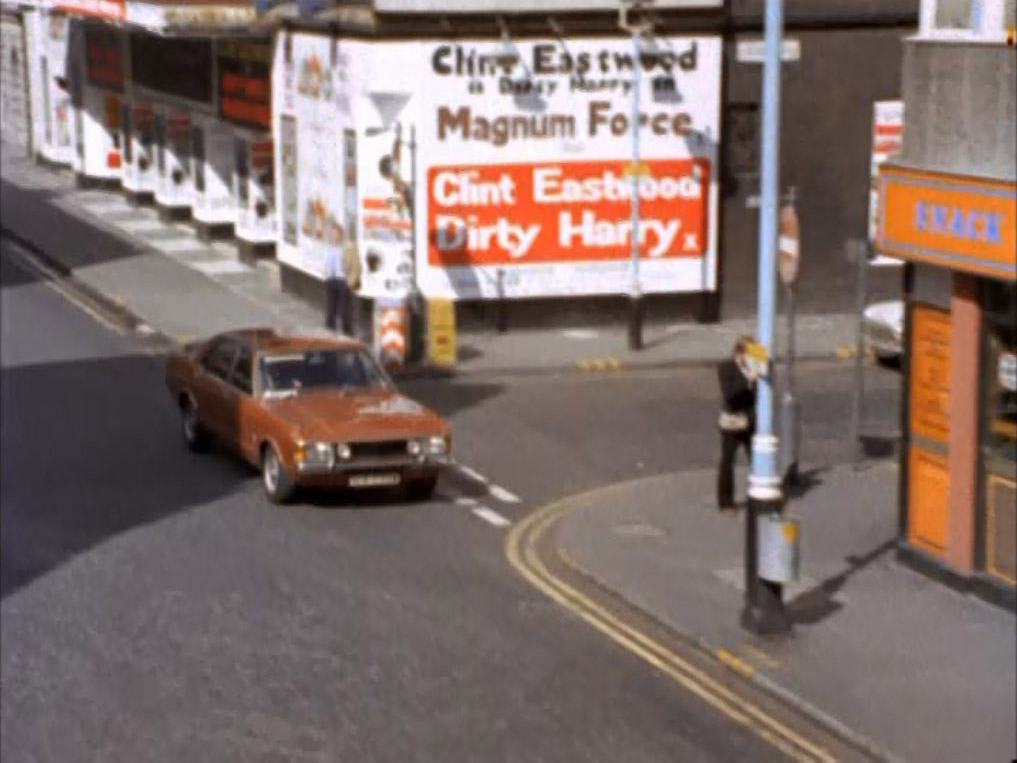
We’re back on the trail of Eddie Boyse – a recently released con whom Regan is convinced took part in a robbery. However, Boyse has a ‘cast iron’ alibi for the time of the job, so Regan has to hunt down any witnesses or information he can find that will tie Eddie to the scene at the time. Here, he goes into a cafe in search of other members of the gang.
Unsurprised to see that whatever the establishment on the corner used to be, it’s now a chain coffee shop. I like the little cop-nod though of the theater being a cinema that was showing a Dirty Harry double-bill. You’ve got to ask yourself one question: where’s the money, you slag?!
Clearly, the shots were taken from a higher vantage point – crane or building – than I could achieve on-foot; nonetheless you can still see the same basic building structures in place, just – as with so much of London these days – looking a degree more clean and shiny.
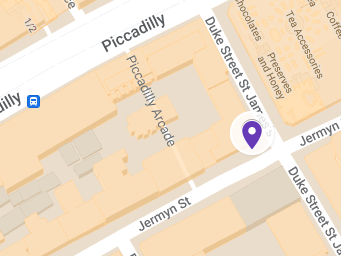
From Old Compton Street it was a little walk on to the next location on Jermyn Street.
Episode Context – S2E03, “Supersnout”
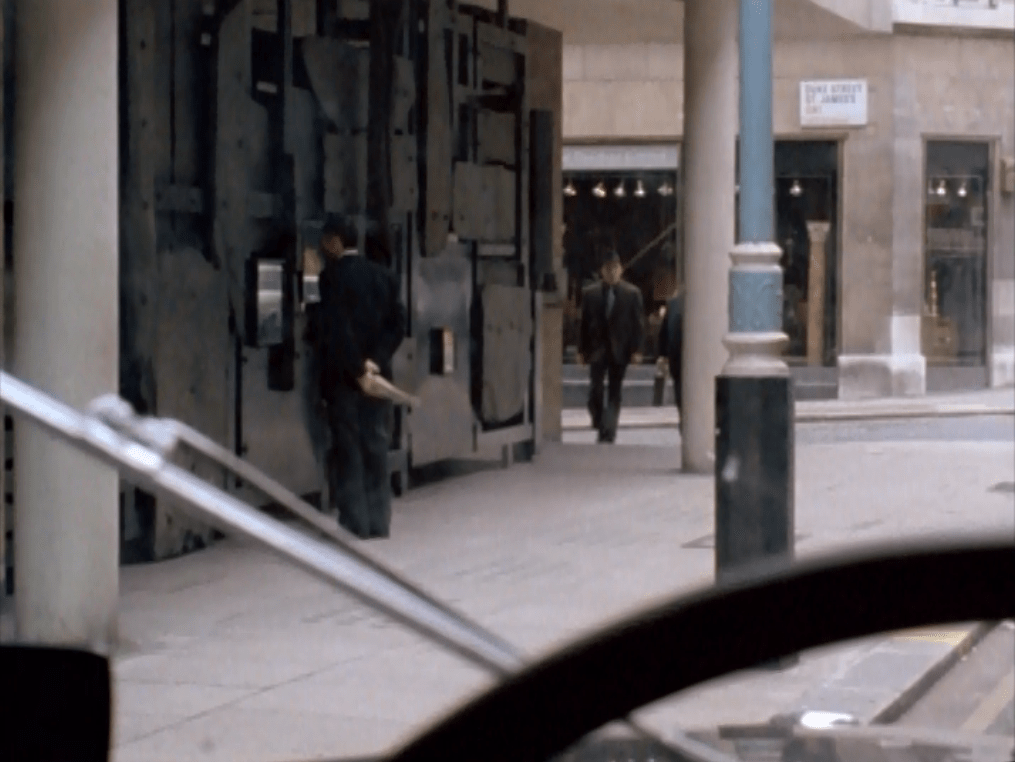
Another mob we’ve been on the trail of before; this time it’s jewel thief Yannos and his gang who are planning to rob a jewelers in St. James’. Quirke – standing in for Haskins who is away in Toronto at a conference – is desperate to capture his ‘great white whale’ Yannos and the fabled ‘Post Office Gang’. However, unbeknownst to Quirke, Regan’s informant Stickley – who is inside on the job – feeds false information to Quirke’s informant who replaces him after the dummy run for the actual job, and as a result the operation is a disaster. Seems Stickley had an old score to settle.
Here we can see the view down Jermyn Street in the direction of St. James’, taken from outside ‘the jewelers’, and then the jewelers itself – now the Alfred Dunhill shop.
After Jermyn Street, the plan was to head to Green Park and from there make a short tube hop to Knighstbridge; however, I was somewhat waylaid by the inconvenience of public conveniences – namely them all being shut. First Green Park station, then Hyde Park Corner – eventually I’d walked pretty much all the way to Knightsbridge anyway still searching in vain. I was pondering going into Harrods – but they didn’t open till 10; in the end a ubiquitous Starbuck’s came to the rescue, after which I wandered another 10 minutes or so for the next location stop of the day.
Episode Context – S2E08, “Poppy”
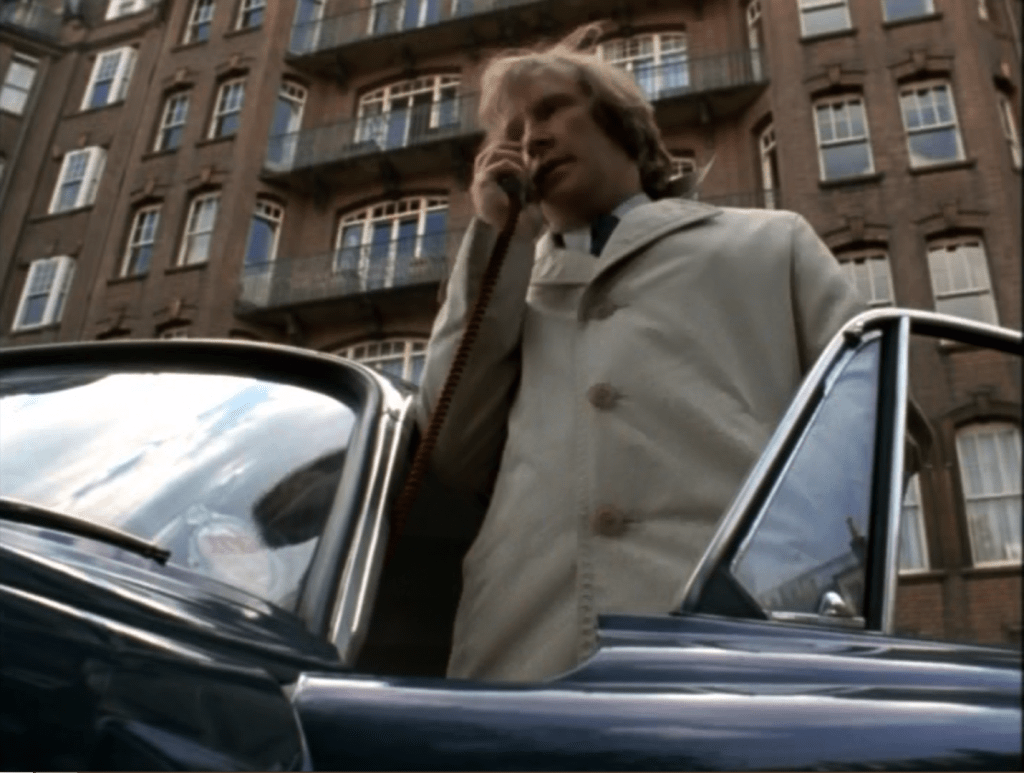
Vic Labbett is back in town, having been holed up in Portugal till the heat from a violent robbery died down a little. Now he wants to recover the stolen loot and trade it for uncut diamonds – in a deal brokered between him and the bank from where the money was stolen by a ‘less than clean’ insurance agent. The bank get their money back on the hush hush, Vic gets the diamonds, everyone’s a winner. However, Regan is tipped off about his return by an informant – and word gets round to Vic’s wife Sally who had no idea he was back in the country. Sally goes round to Vic’s mate Ron’s (1) to see if he knows anything of Vic’s whereabouts. During the investigation, The Squad have the bank manager under surveillance and see the insurance agent, Vane, in talks with him; this leads them to put Vane under surveillance at his flat (2).
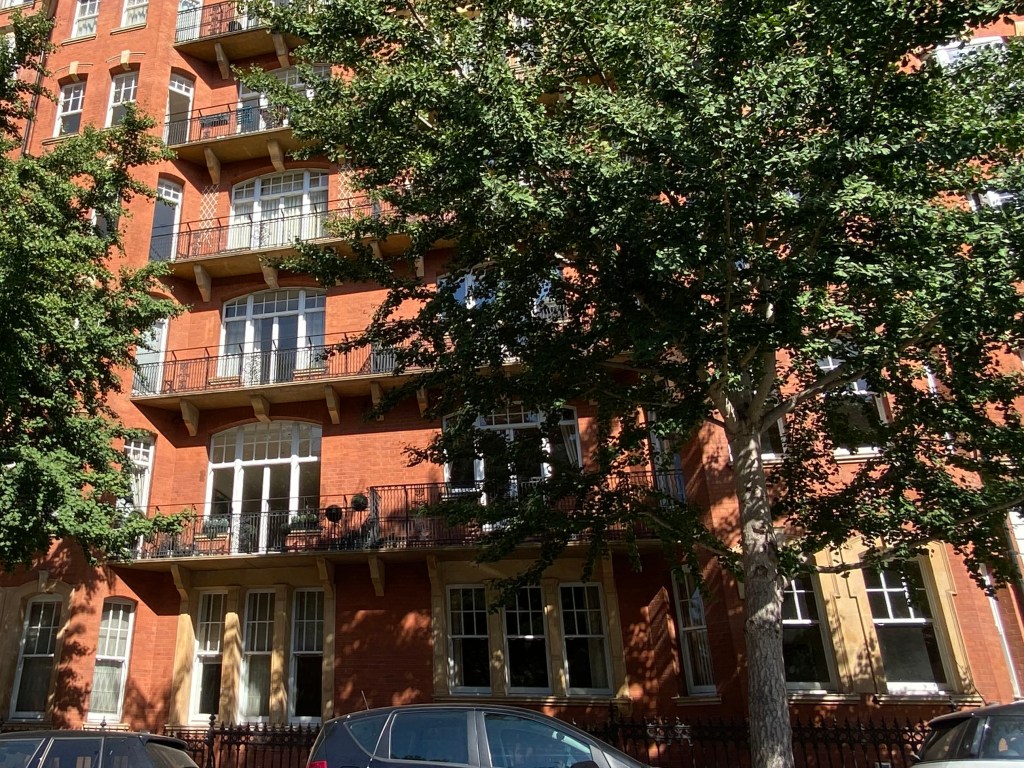
The location of Ron’s flat is given as Ennismore Gardens Mews; however, its position looking directly out over the square makes this seem questionable. The mews runs round the back of the main part of Ennismore Gardens, and none of the mews houses is remotely tall enough to see over the 4- and 5-storey houses surrounding the square. Therefore, it’s difficult to pinpoint exactly where they were filming those shots from – especially as it seems there was some kind of school playground in the square back in the 70s; the ‘now’ shot below gives the general sense of the buildings, though.
I struggled with this one – endless Google Street View and then walking round the square in person didn’t really give me a solid hit, hence settling for something a bit general. I don’t usually like to do that, but sometimes it’s the only option.
On a more positive note, the next set of shots from Vane’s apartment building are much more authentic looking:
After the jaunt round Ennismore Gardens, I had a bit of a longer trek to get to the next location; so it was on to a bus and heading West along Kensington High Street, alighting a little before Olympia to walk North to the next point of interest.
Episode Context – S2E11, “I Want The Man”
“Popeye”, one of Regan’s informants, has gone missing after phoning Regan with information that small-time crook Frankie Little was going to be involved in a diamond theft. Regan pulls Little – but tells him he’ll consider letting the charges drop in exchange for Little leading him to Maynard, the bigger fish. Whilst turning over the flat of Little’s daughter, Sandy, they find a fag packet with a phone number on it that leads them to a block of flats, which they stake out – hoping to discover who answers when the phone in question rings on one of the landings.
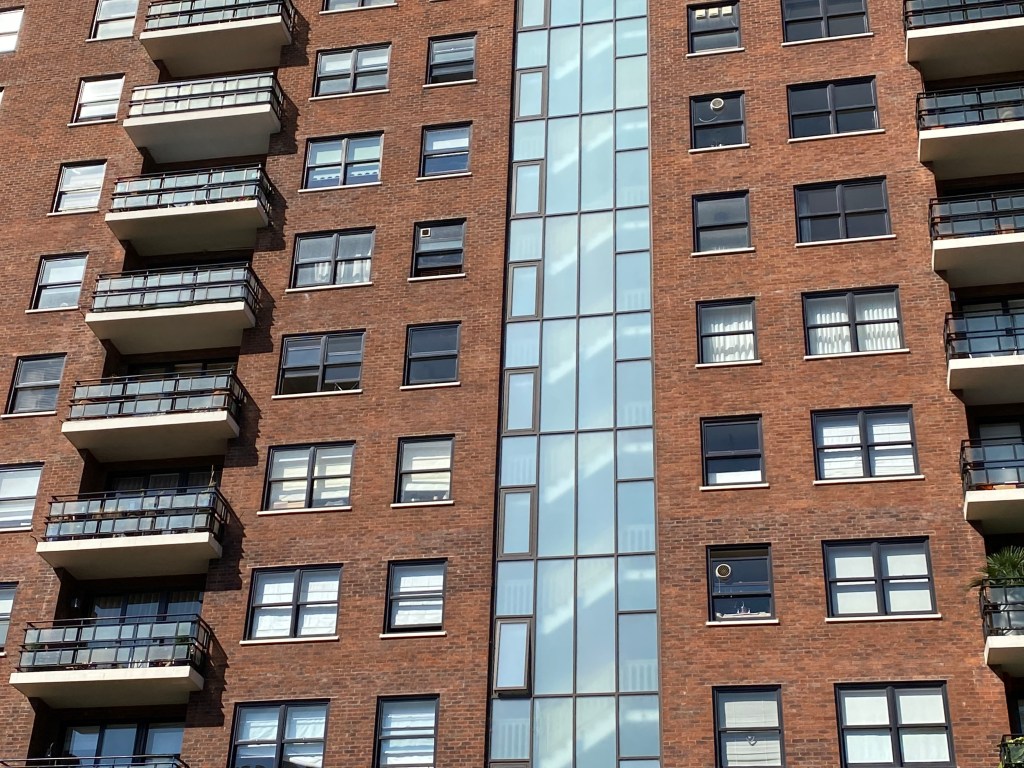
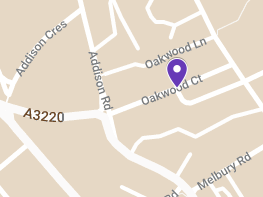
This particular location, on Oakwood Court in the Holland Park neck of the woods, is one of those examples of retreading ground already trod – I walked right down this road past the building in question on my Holland Park to Shepherd’s Bush jaunt, 3 years previously. However, as stated in the ‘methodology’ section of my intro to all this – it’s bound to happen. This was just one where I’d been nearby and not realised it was an episode location; later on in the day, I visited some where the exact same spot was used in 2 completely different episodes, just seen from different angles. More on that coming up in part 2.